How To Measure Your Body To Get The Best Fit
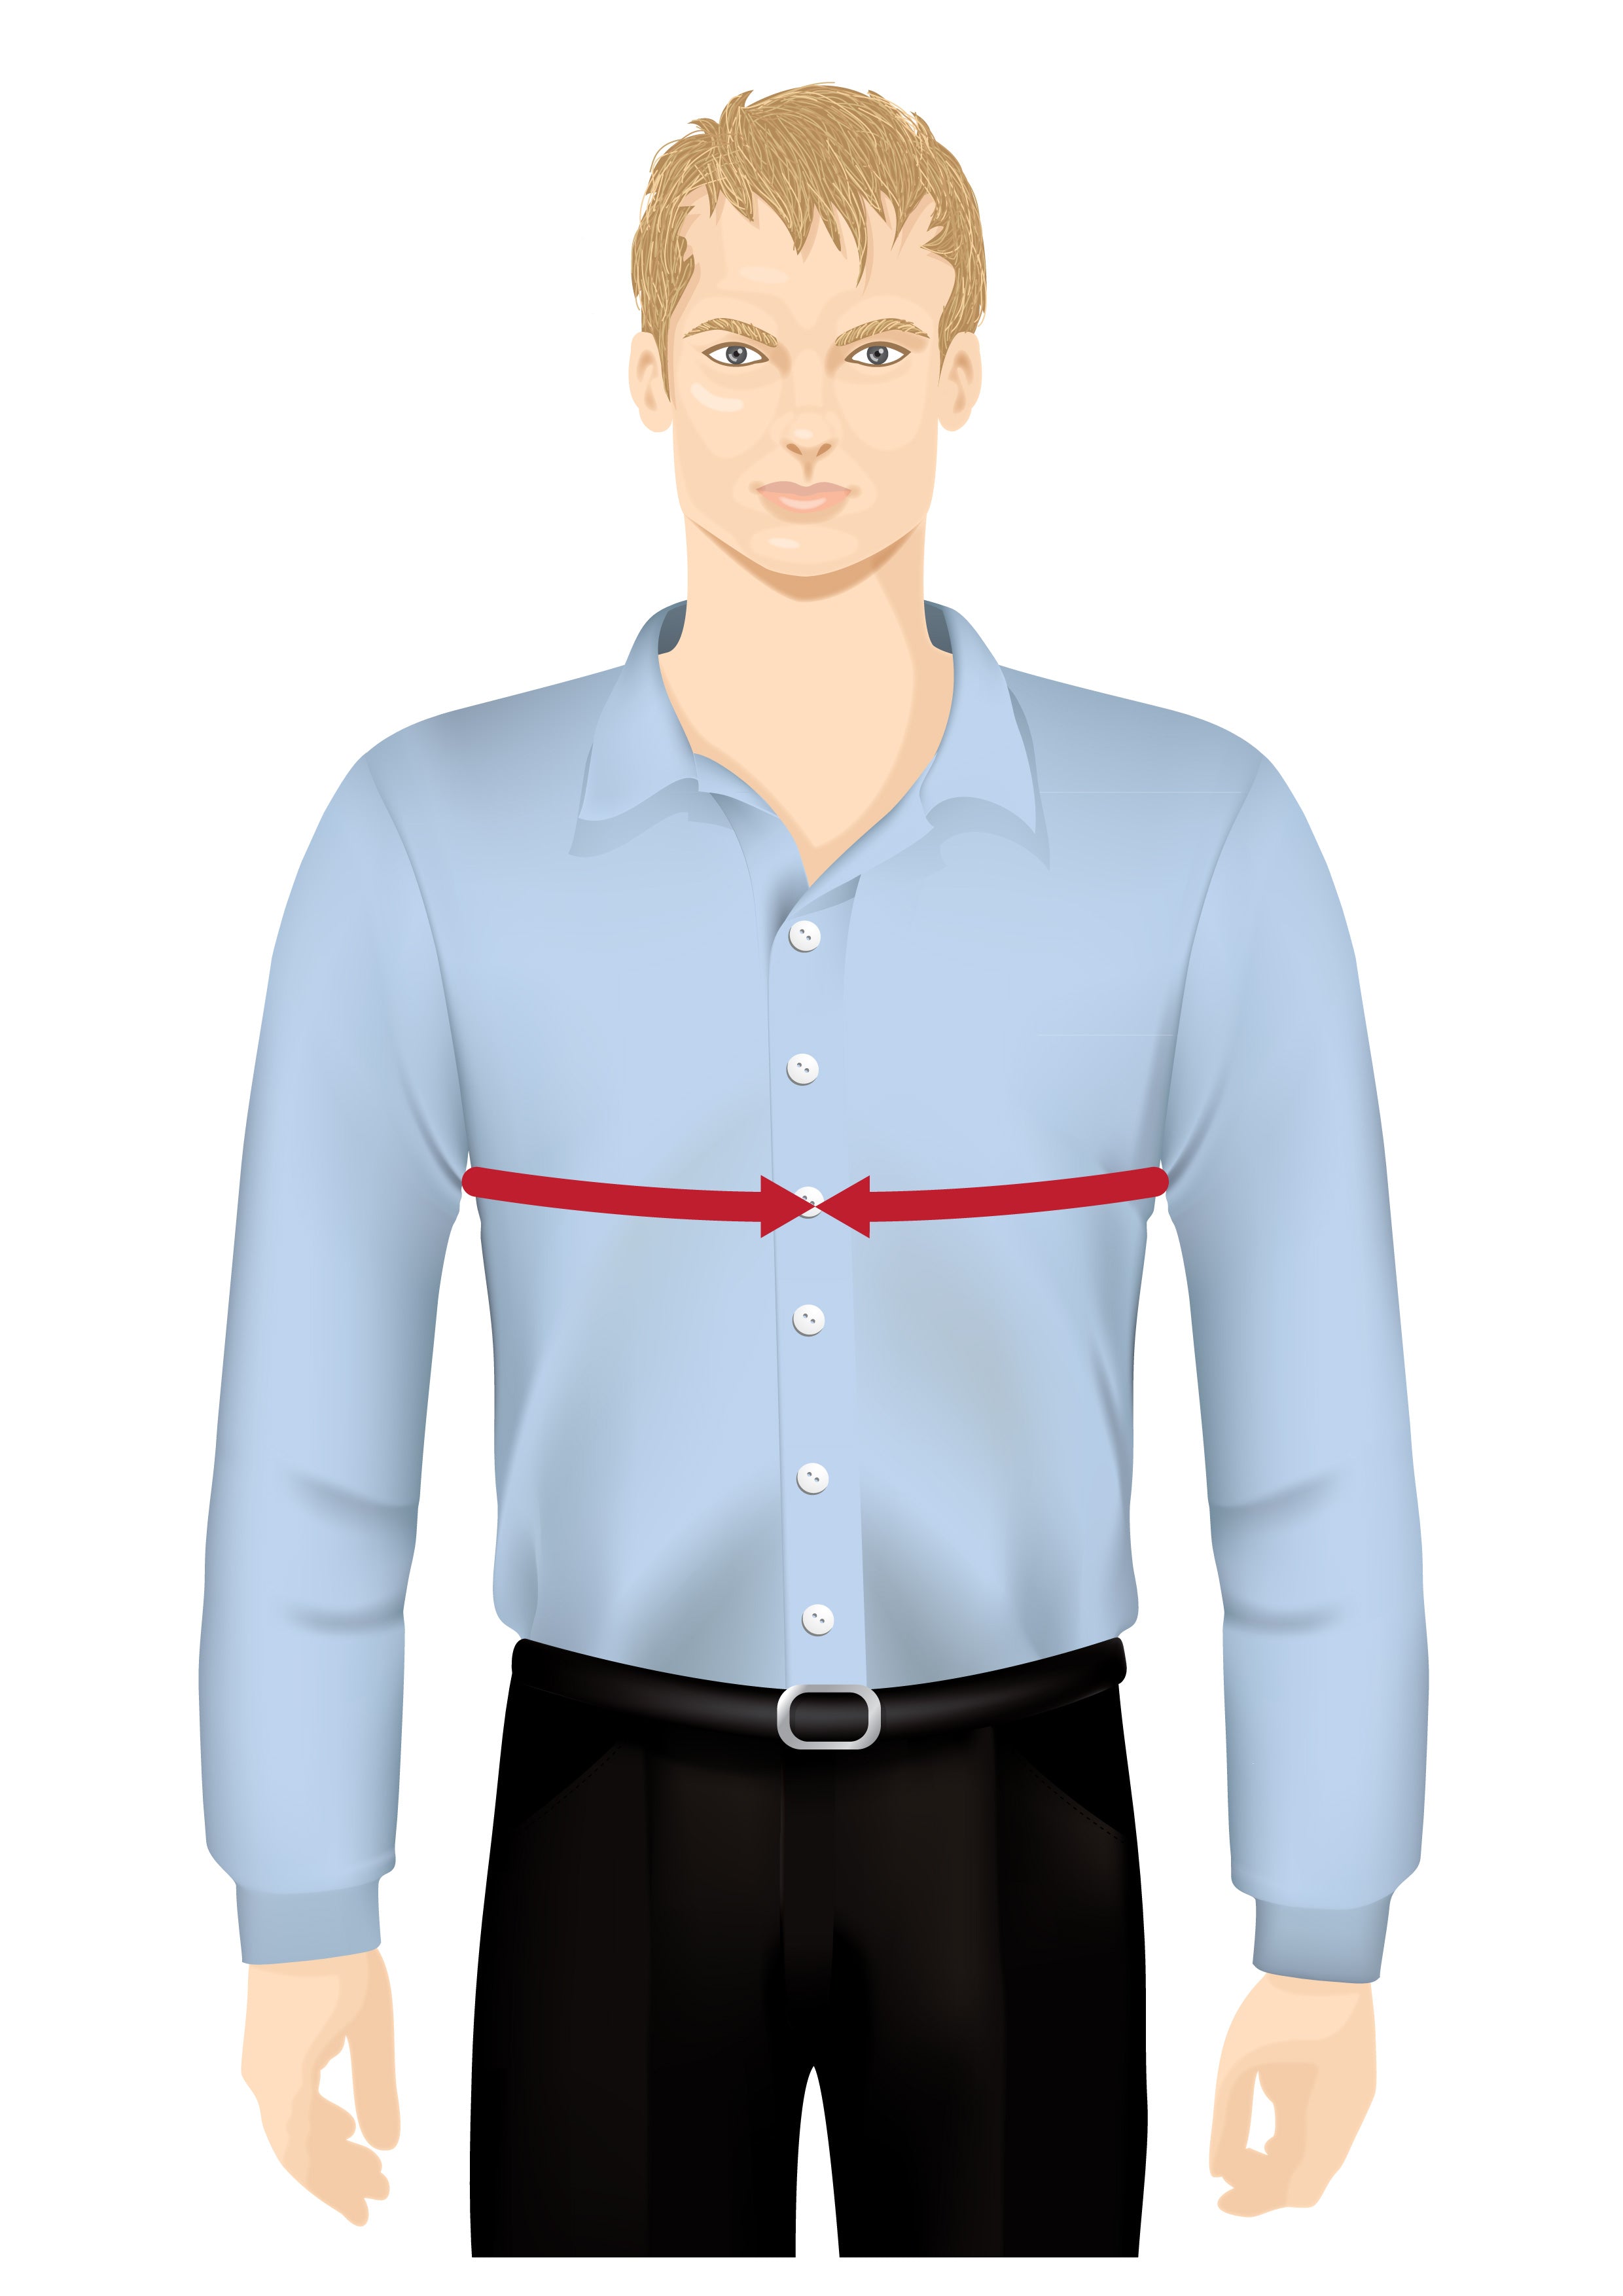
Chest
Keeping your chest relaxed, run the tape around the chest, high up into the armpit, horizontal to the floor, and over the shoulder blades. The tape will need to cover the fullest part of the chest. Keep the tape snug around the body, but not tight.
Make note if you have a barrel chest (round front). Upload photos to your profile page (if possible). When drafting such patterns, we need to add more ease in the front chest, compared with the back, for a more comfortable fit.
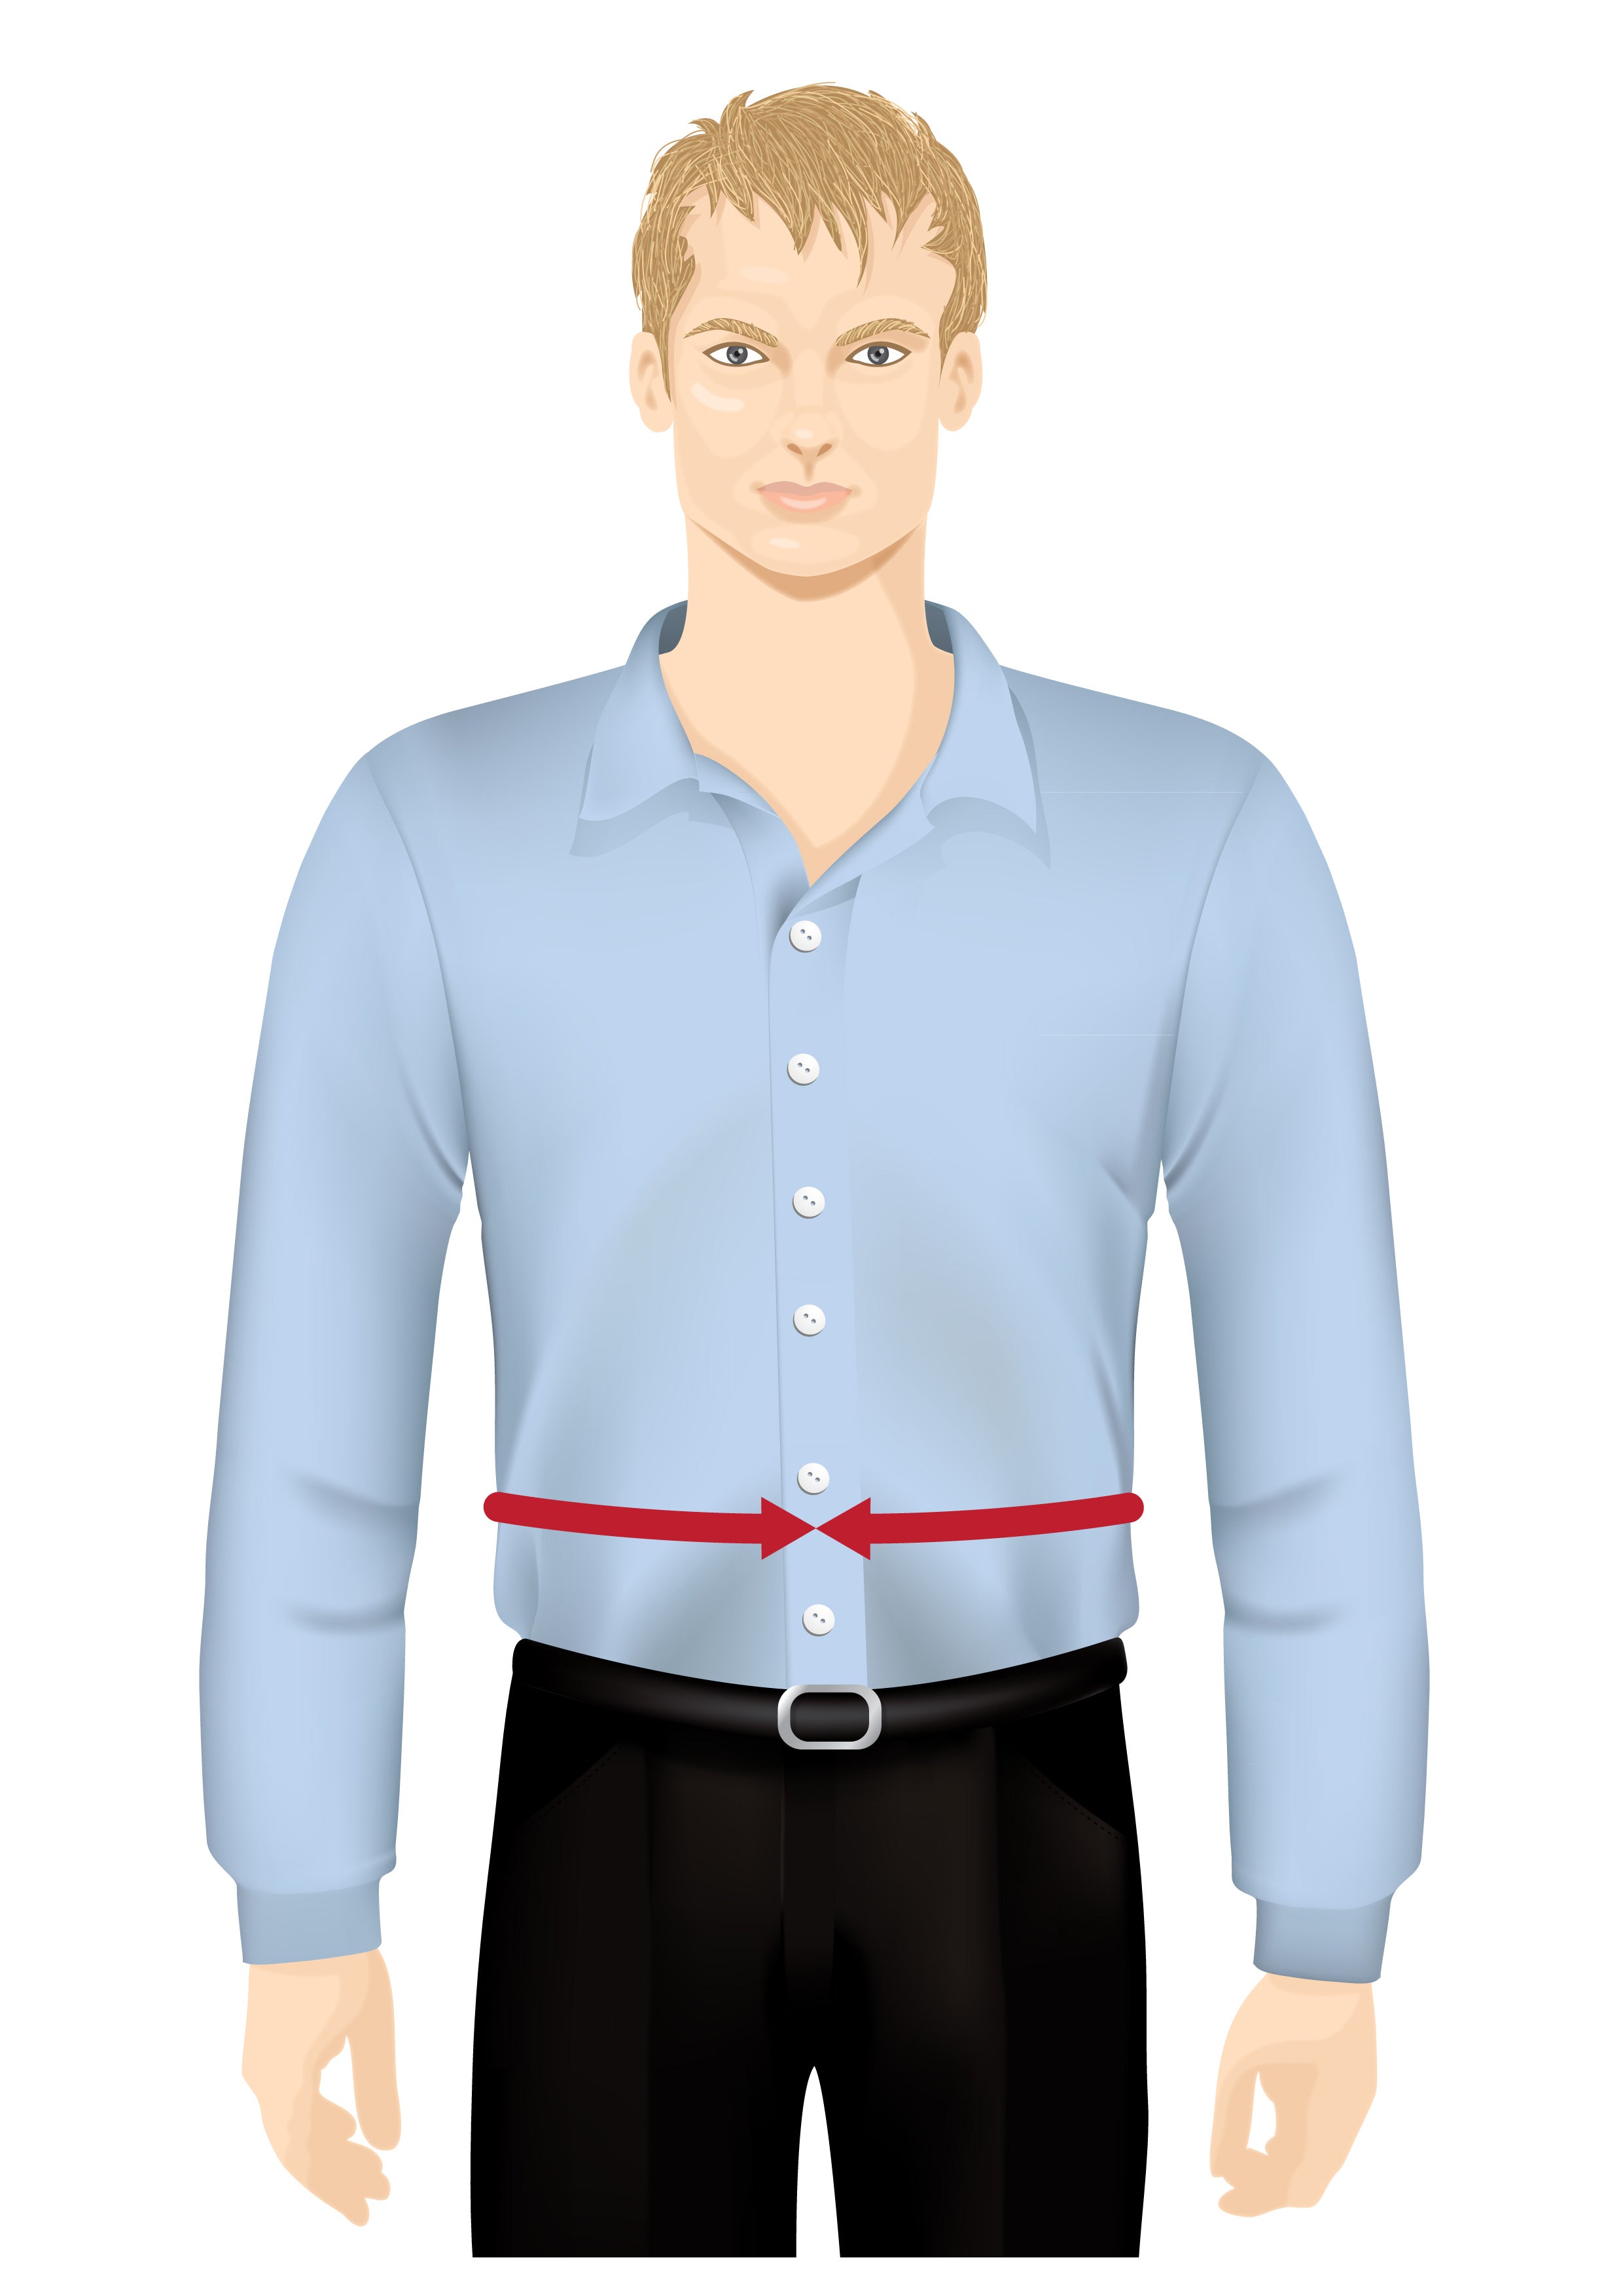
Stomach
Run the tape around the navel or belly button, horizontal to the floor. Keep the tape snug around the body, but not tight. Keep in mind, some men have bulging or prominent stomachs. If so, we will need to cut the front panel of the jacket / vest longer than standard since it will rise up when wearing the garment.
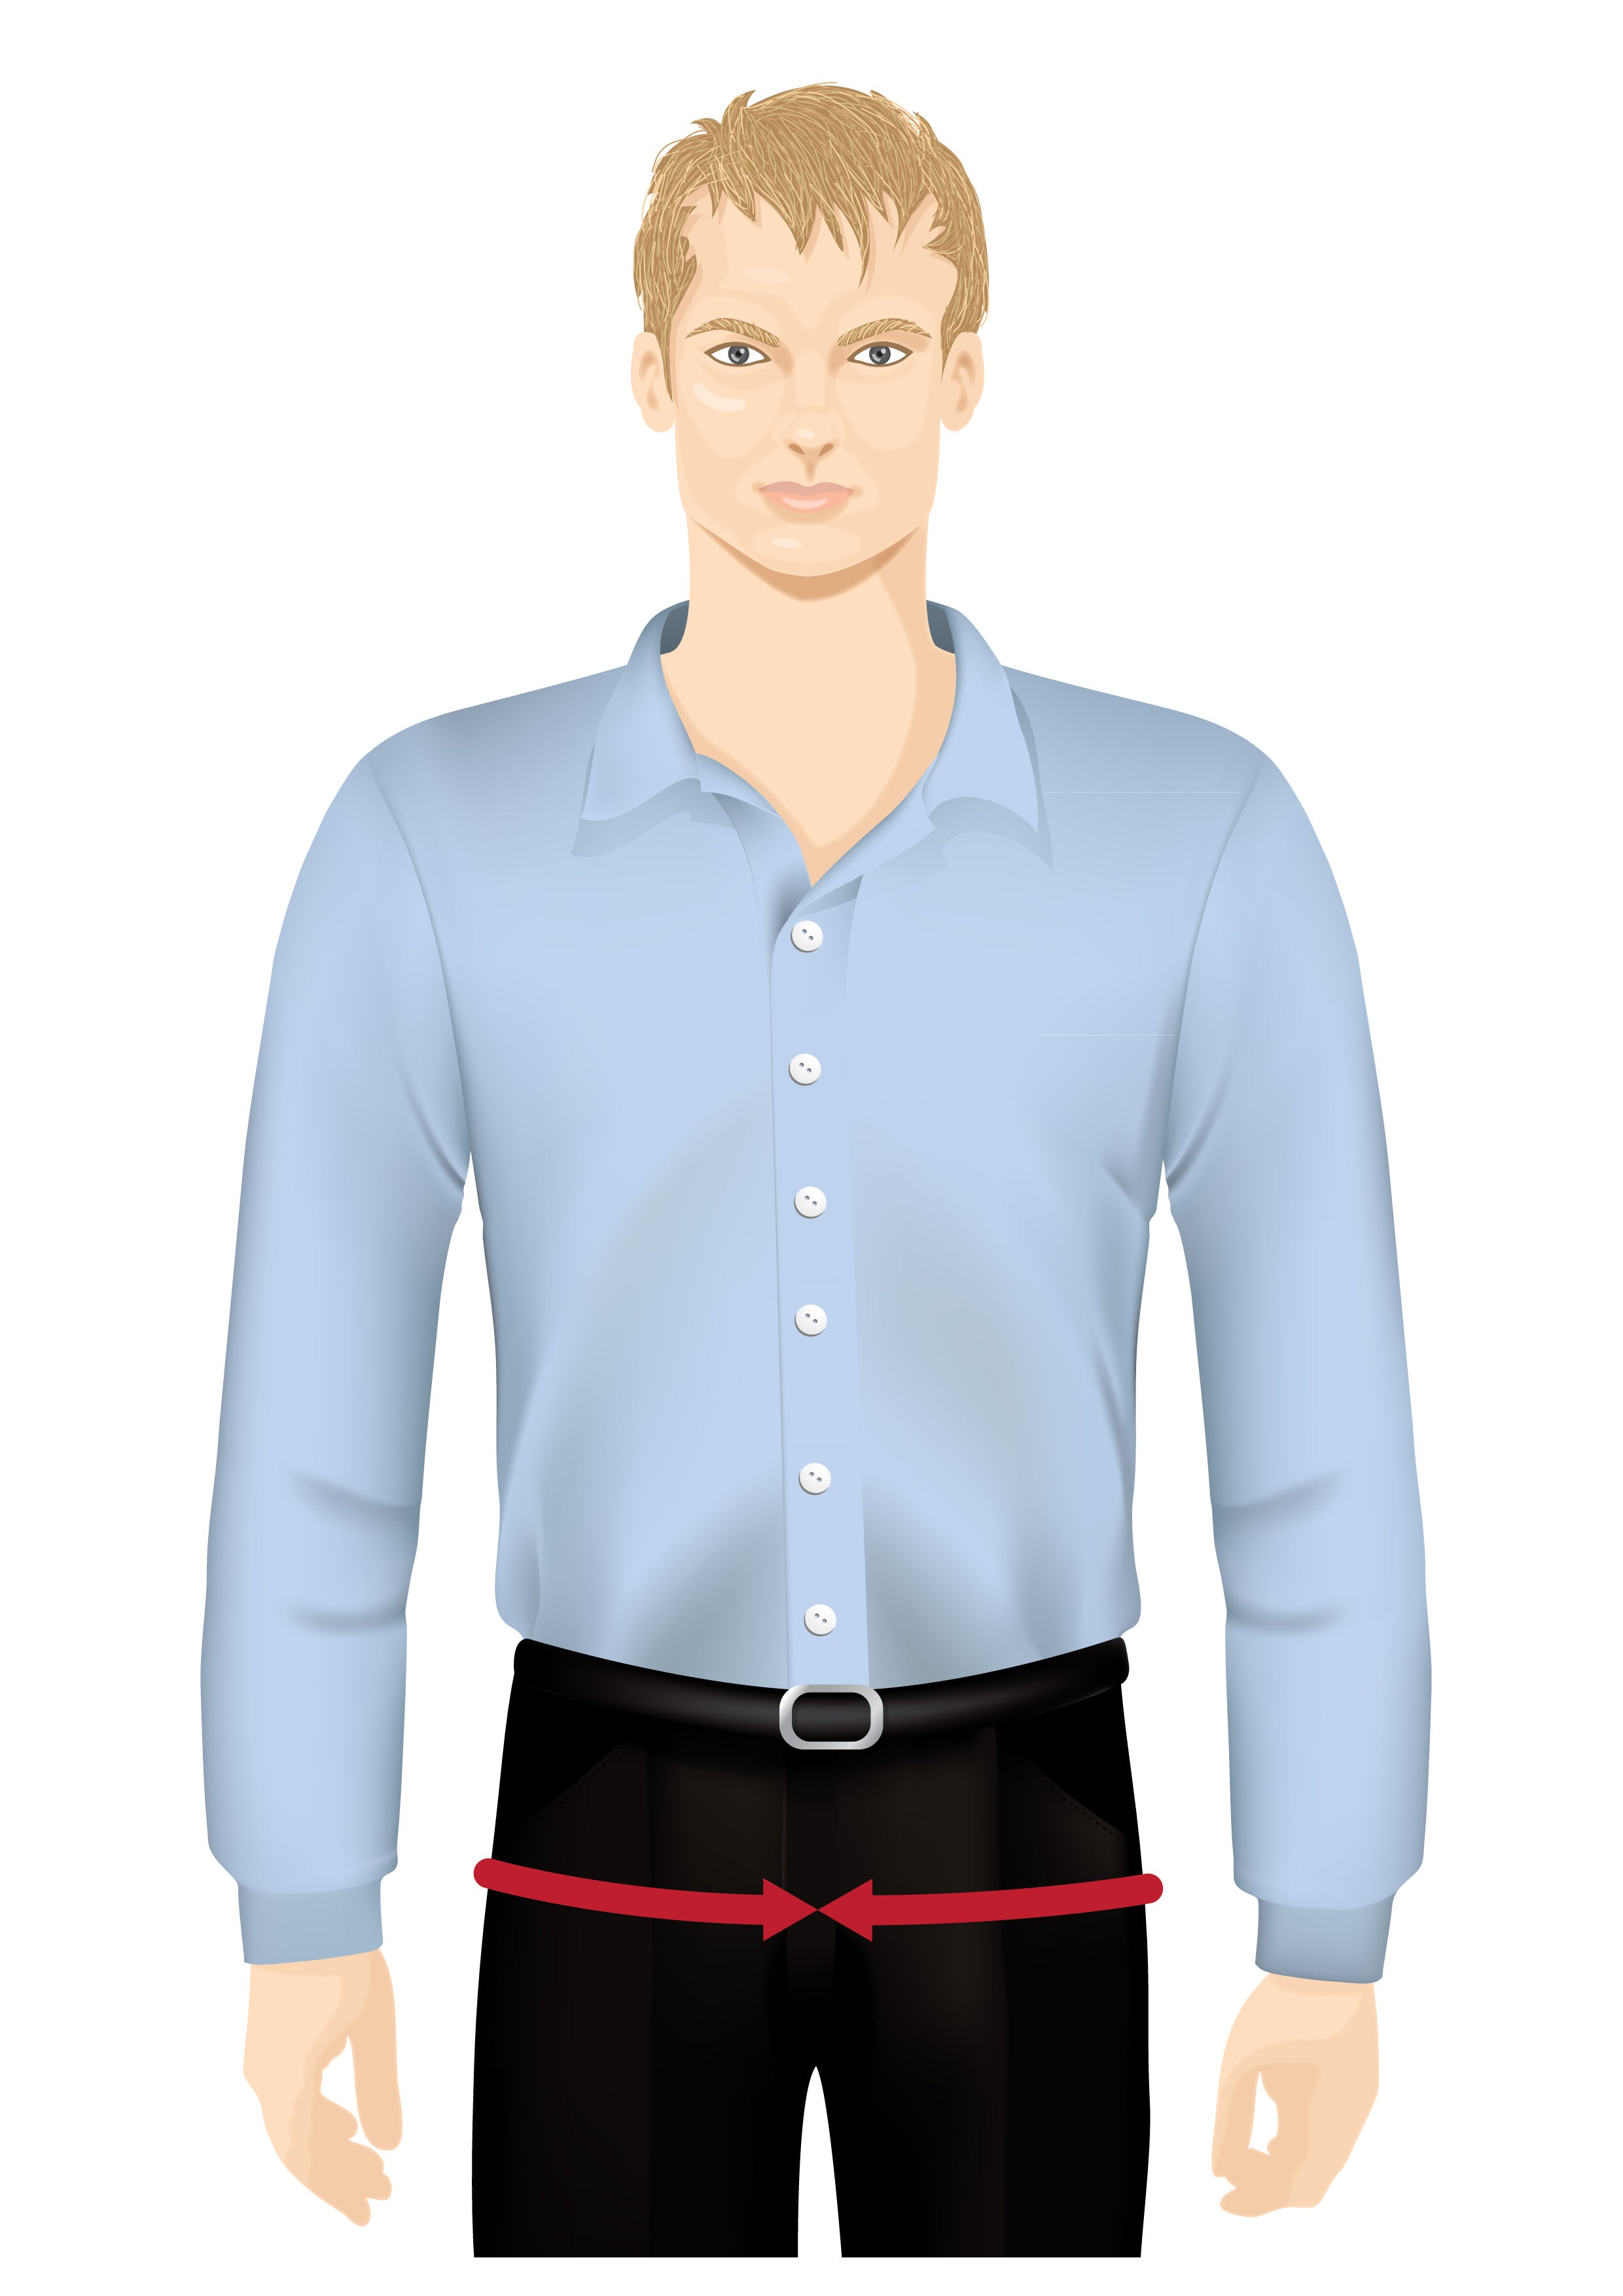
Seat (Hips)
Put your feet together. Bulky objects in the pockets should be removed.
Measure around the fullest part of your hips, which is generaly over the lower part of your hip bone, and over the fullest part of your seat. Keep the tape measure snug, but not tight and parallel to the ground.
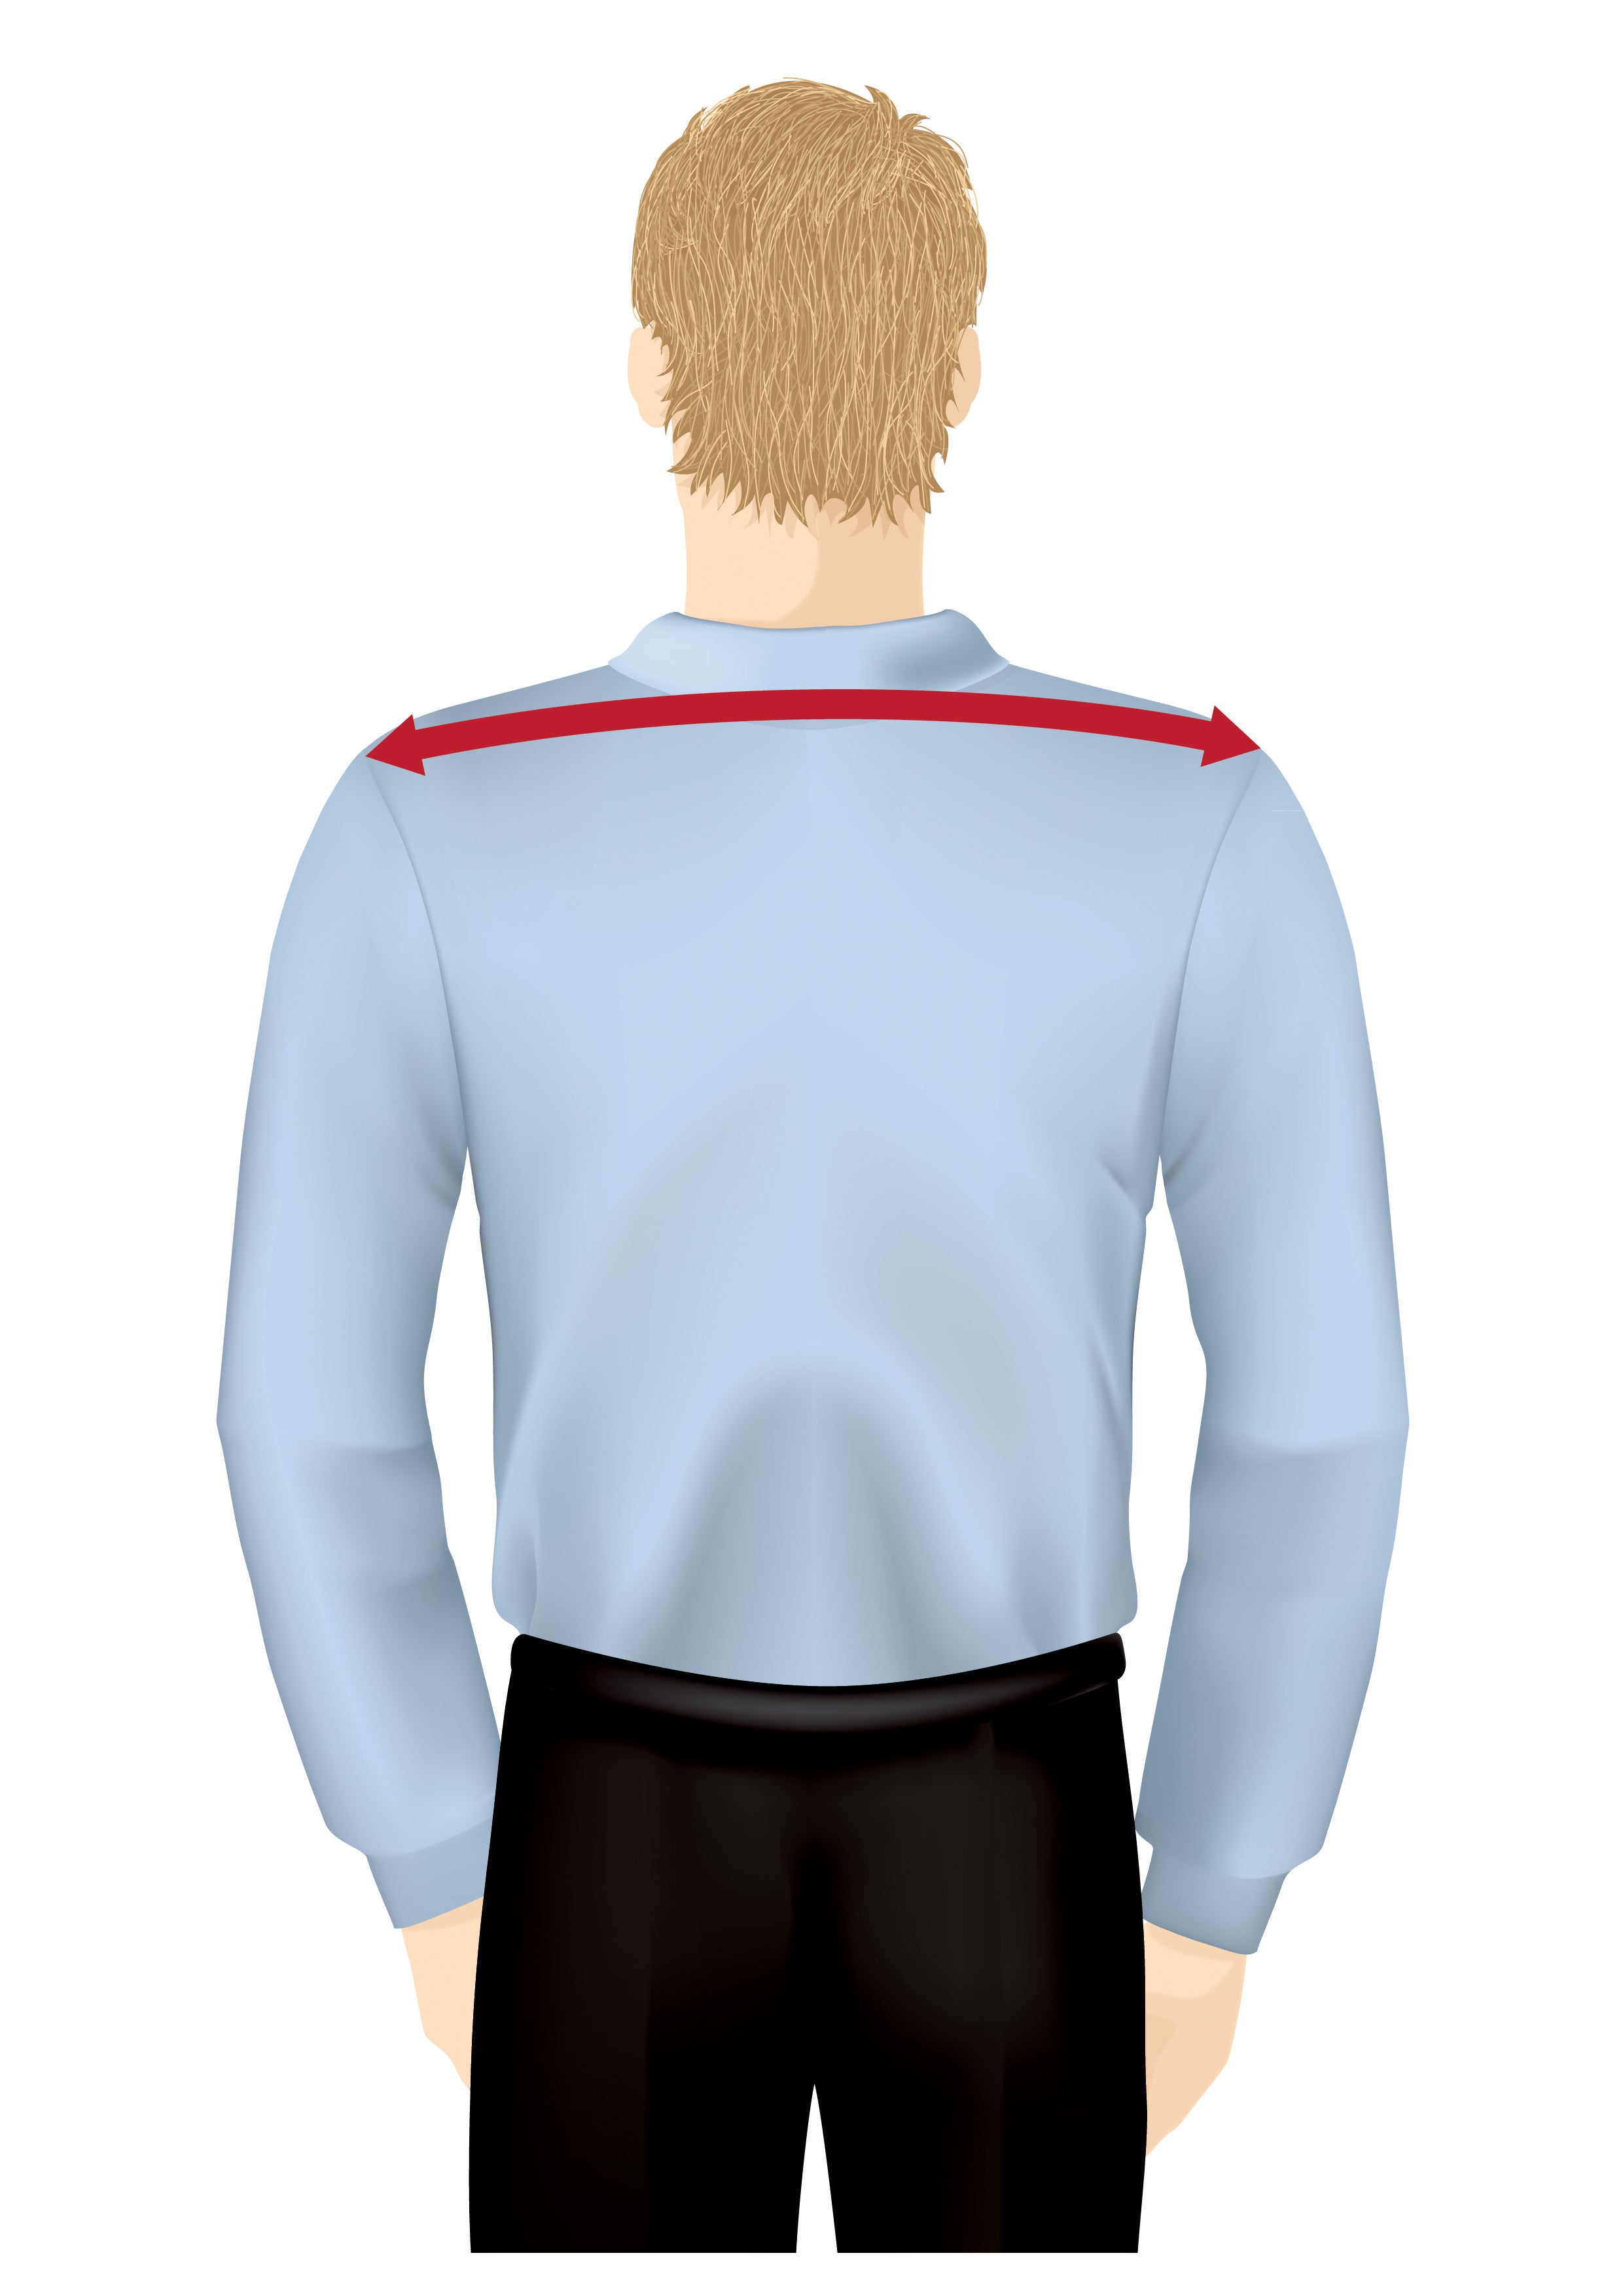
Shoulders
Starting at the outer edge of one shoulder bone, run the tape following the arch of the back to the same point on the opposite side of the shoulder.
Tailoring Tip - Check to see if you have forward facing or curved shoulders. Some clients have square or sloping shoulders. Upload photos to your profile if possible for a more accurate fit.
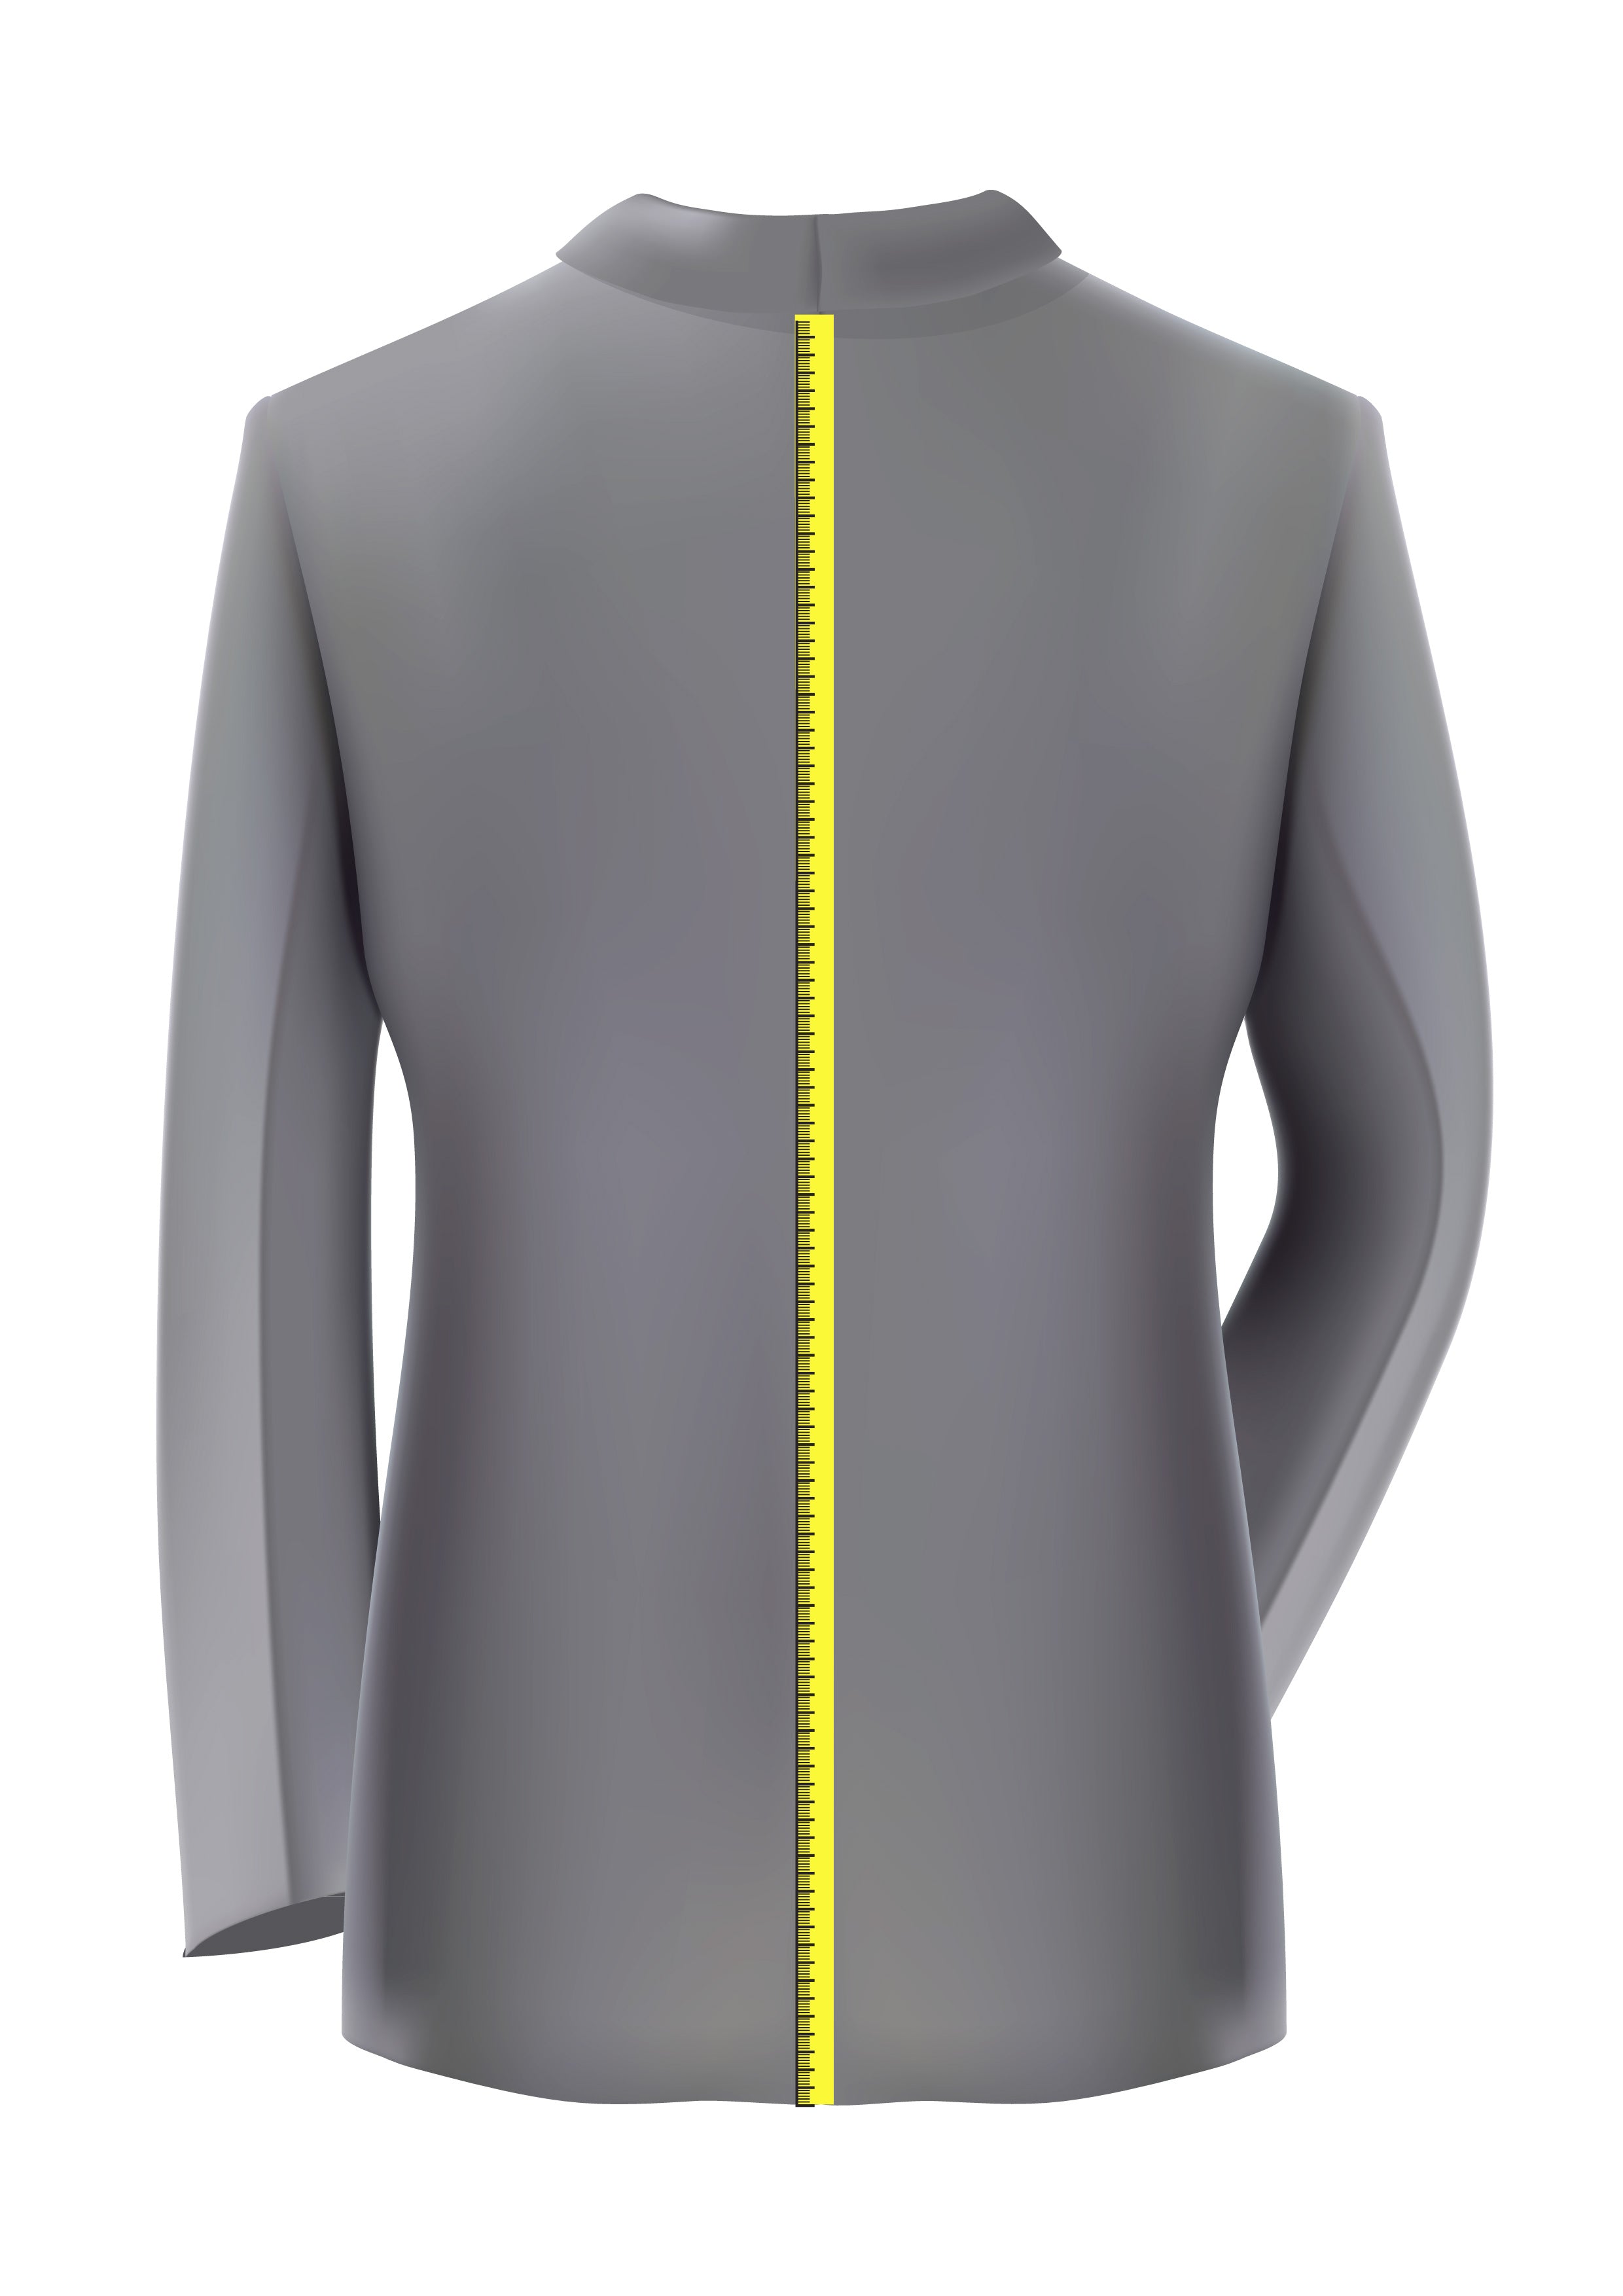
Jacket Back Length
Run the tape vertically down from the nape of neck (bottom of the shirt collar), down to where you would like the jacket to end.
If you have a good fitting jacket, measure from the back length from under the collar where the felt meets the cloth, to the bottom of the jacket.
Tailoring Tip - If you do not have a good fitting jacket, a good reference point is to measure just below the seat (just below the buttocks).
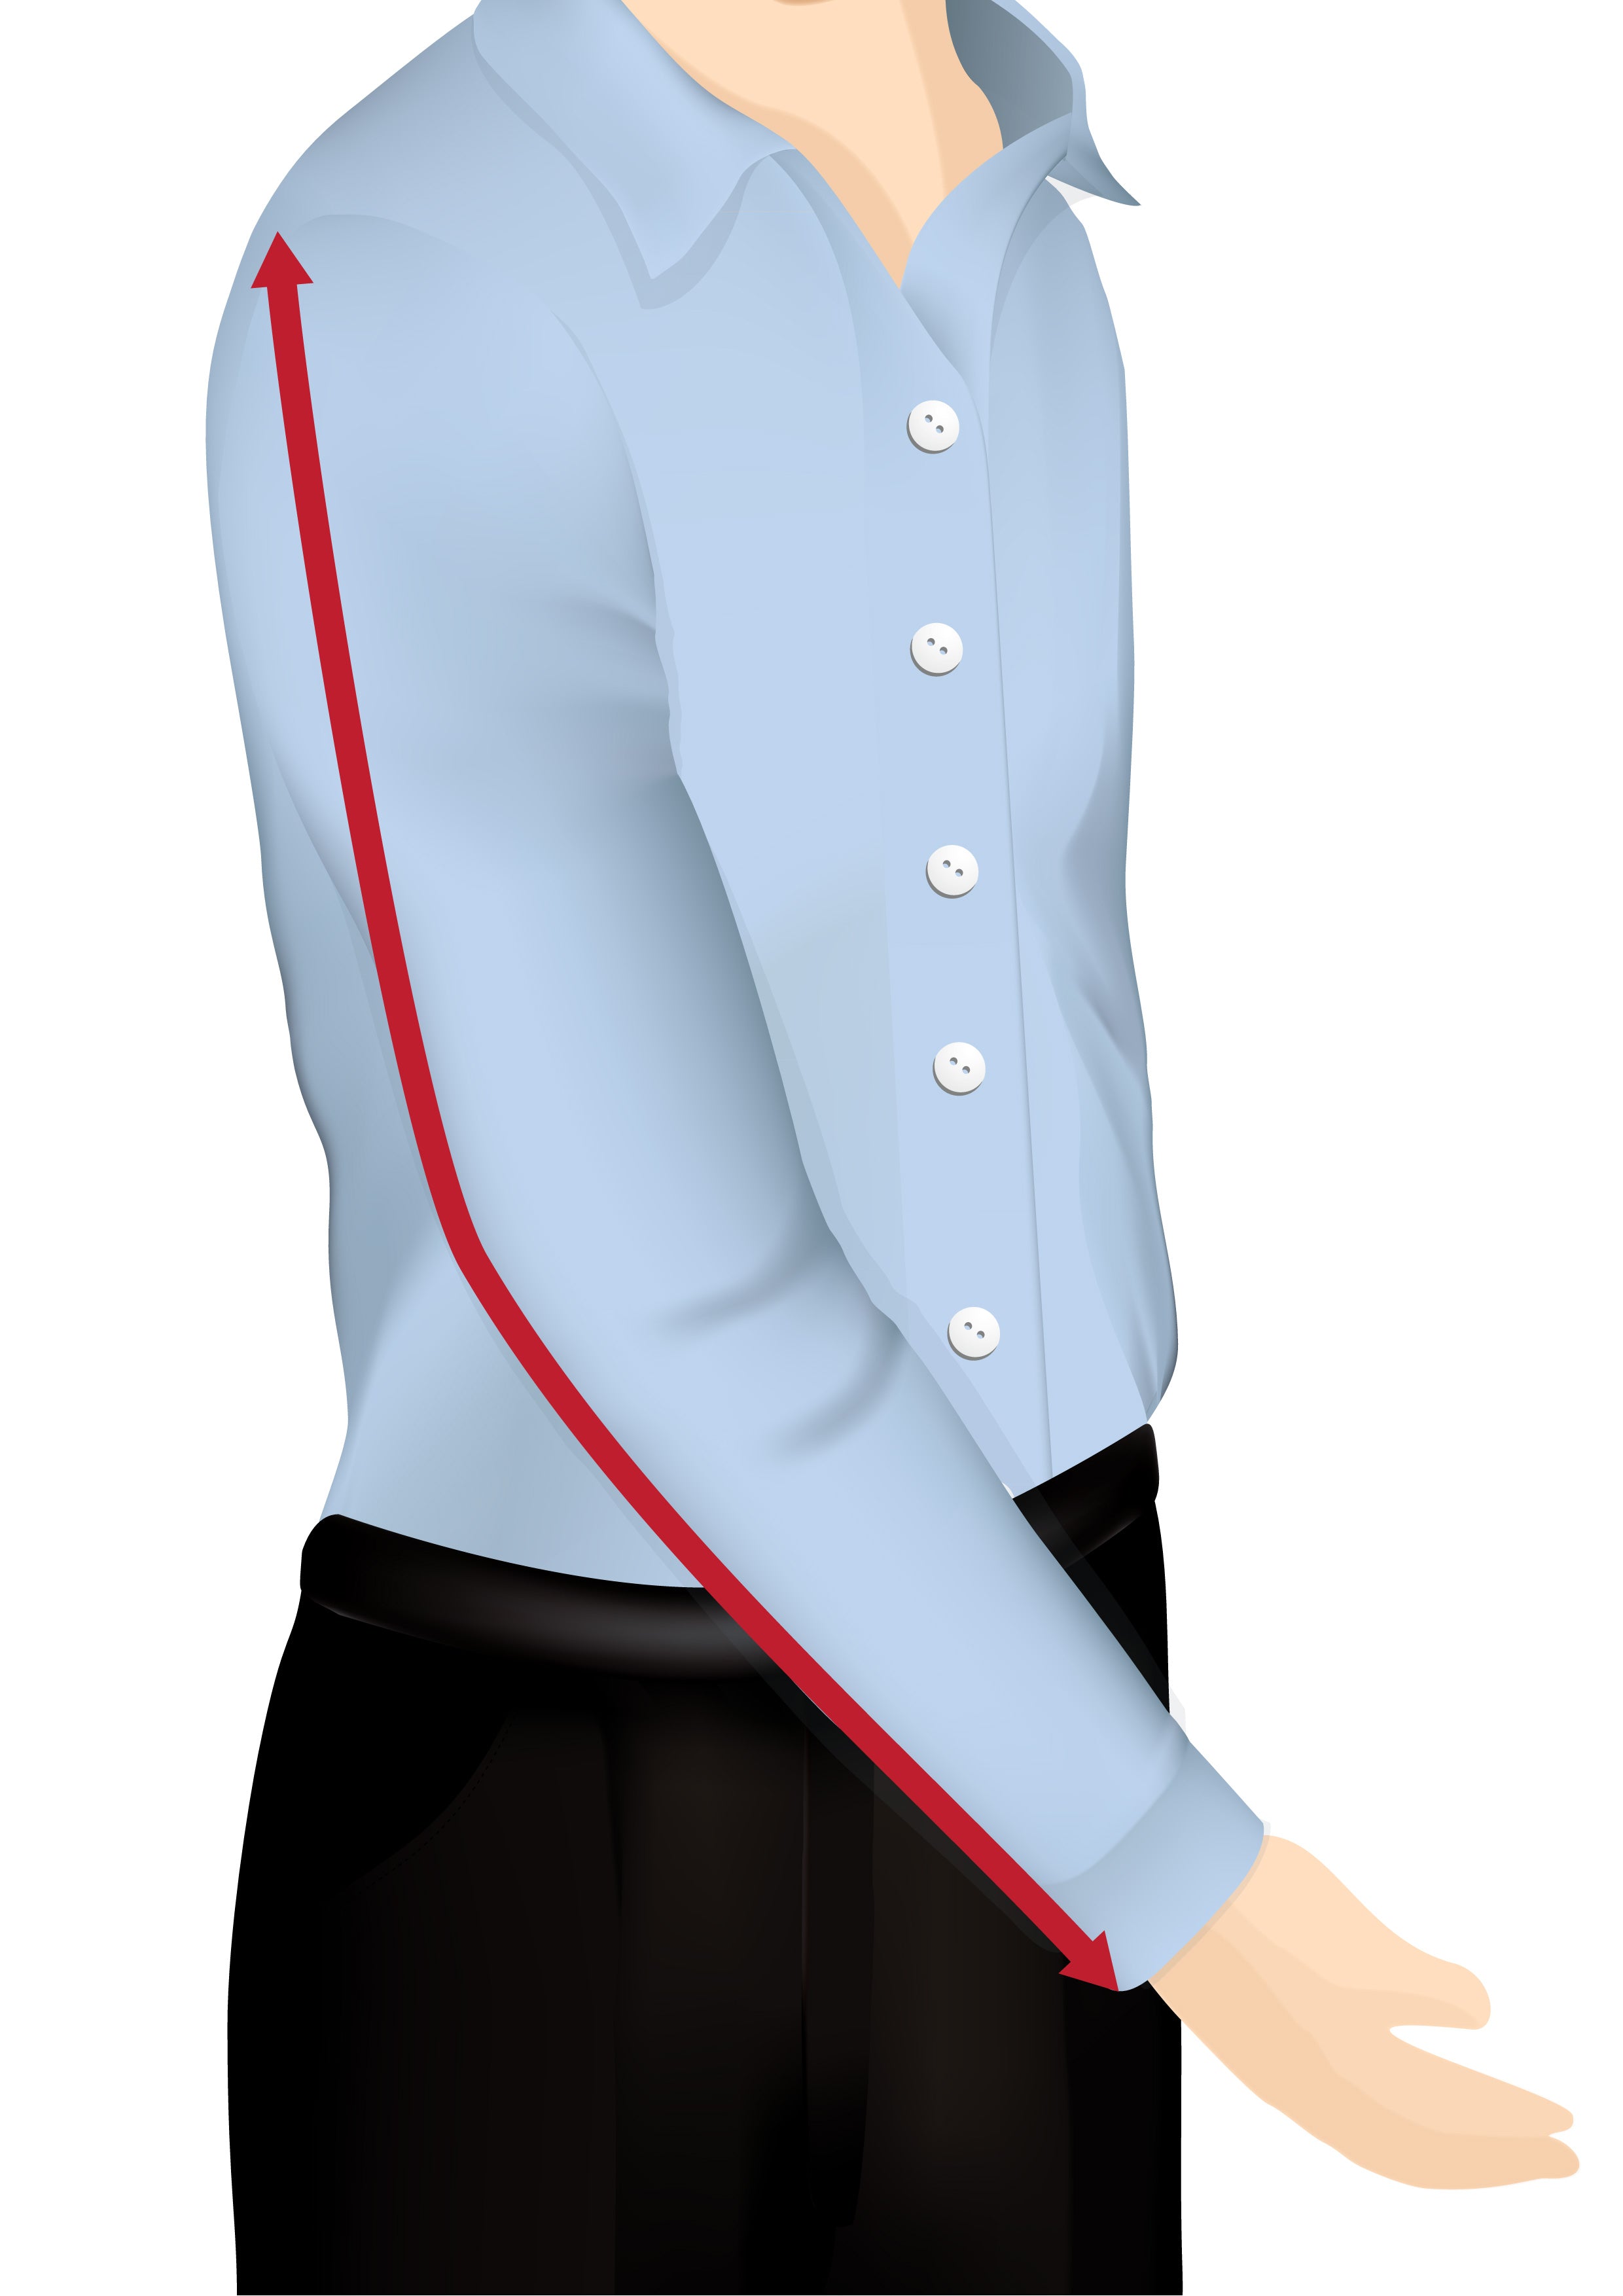
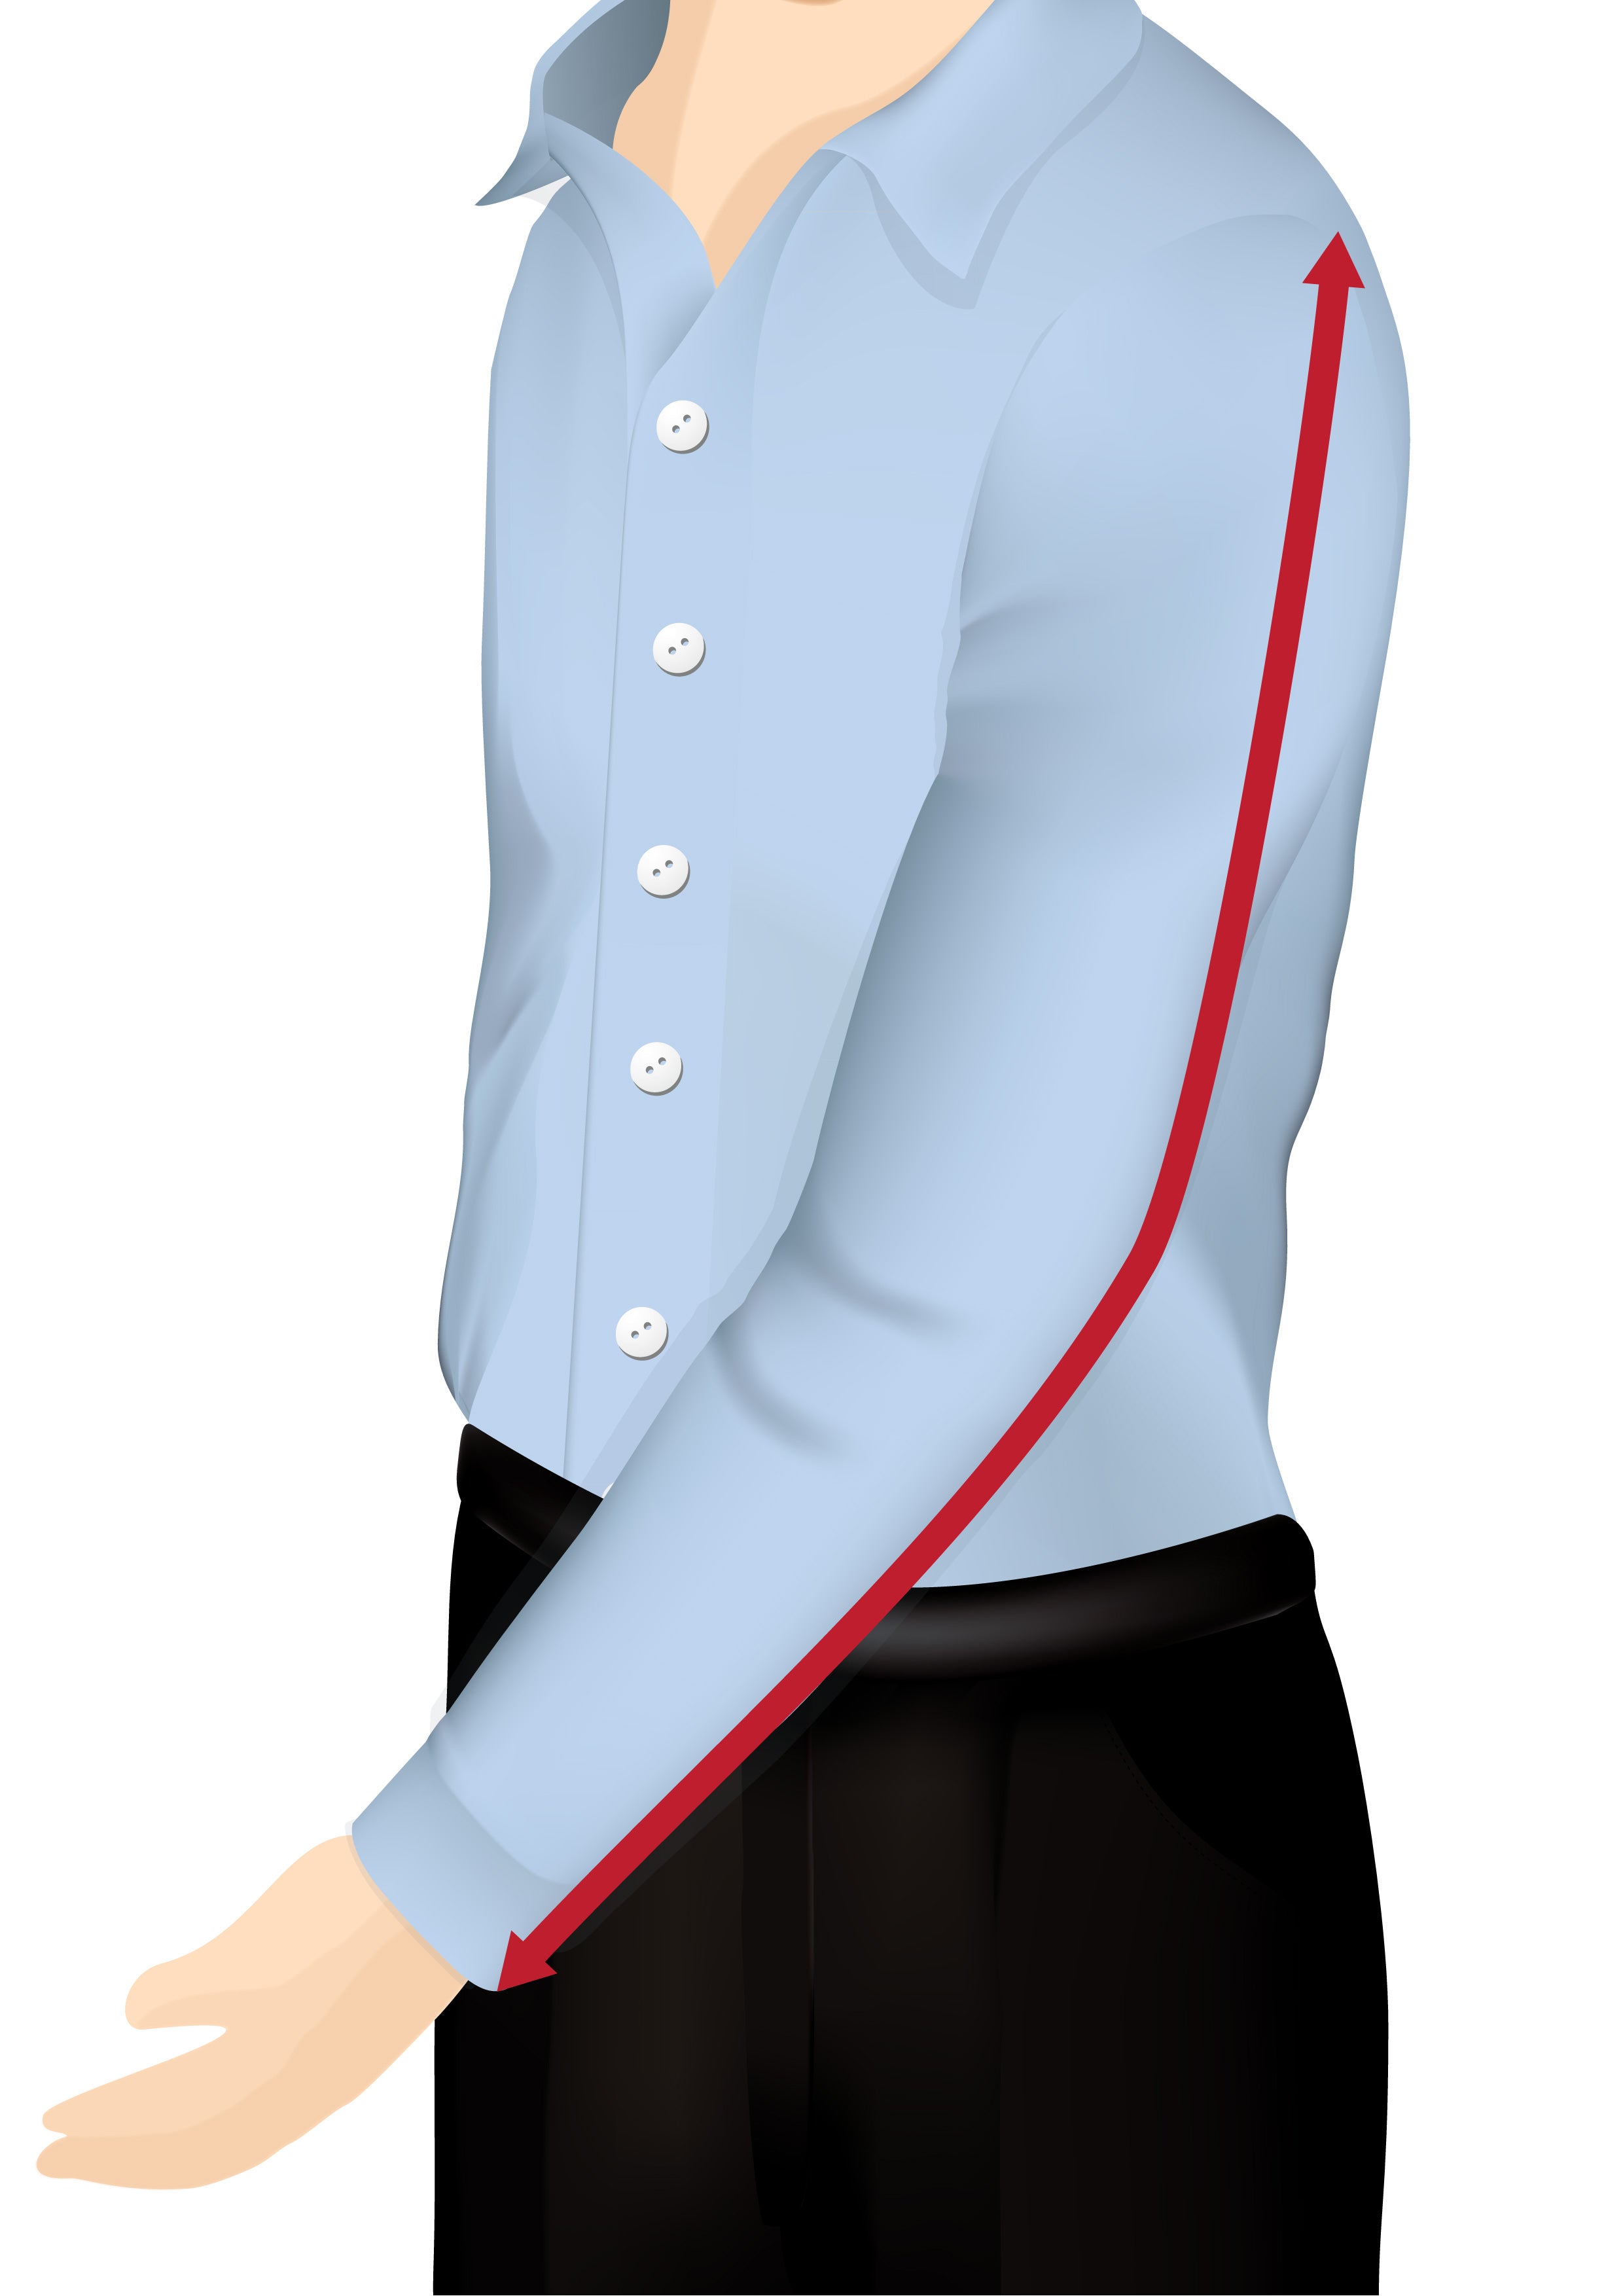
Sleeve Length
Run the tape from shoulder point to elbow and continue down to length required (usually measured up to the base of the wearers thumb / wrist joint).
Be sure to take a separate measurement for the right and left sleeves.
Make sure your arm hangs naturally and relaxed. Take the measurement running down the natural curve or bend of the arm, not completely vertically straight, or the sleeves could be made too short.
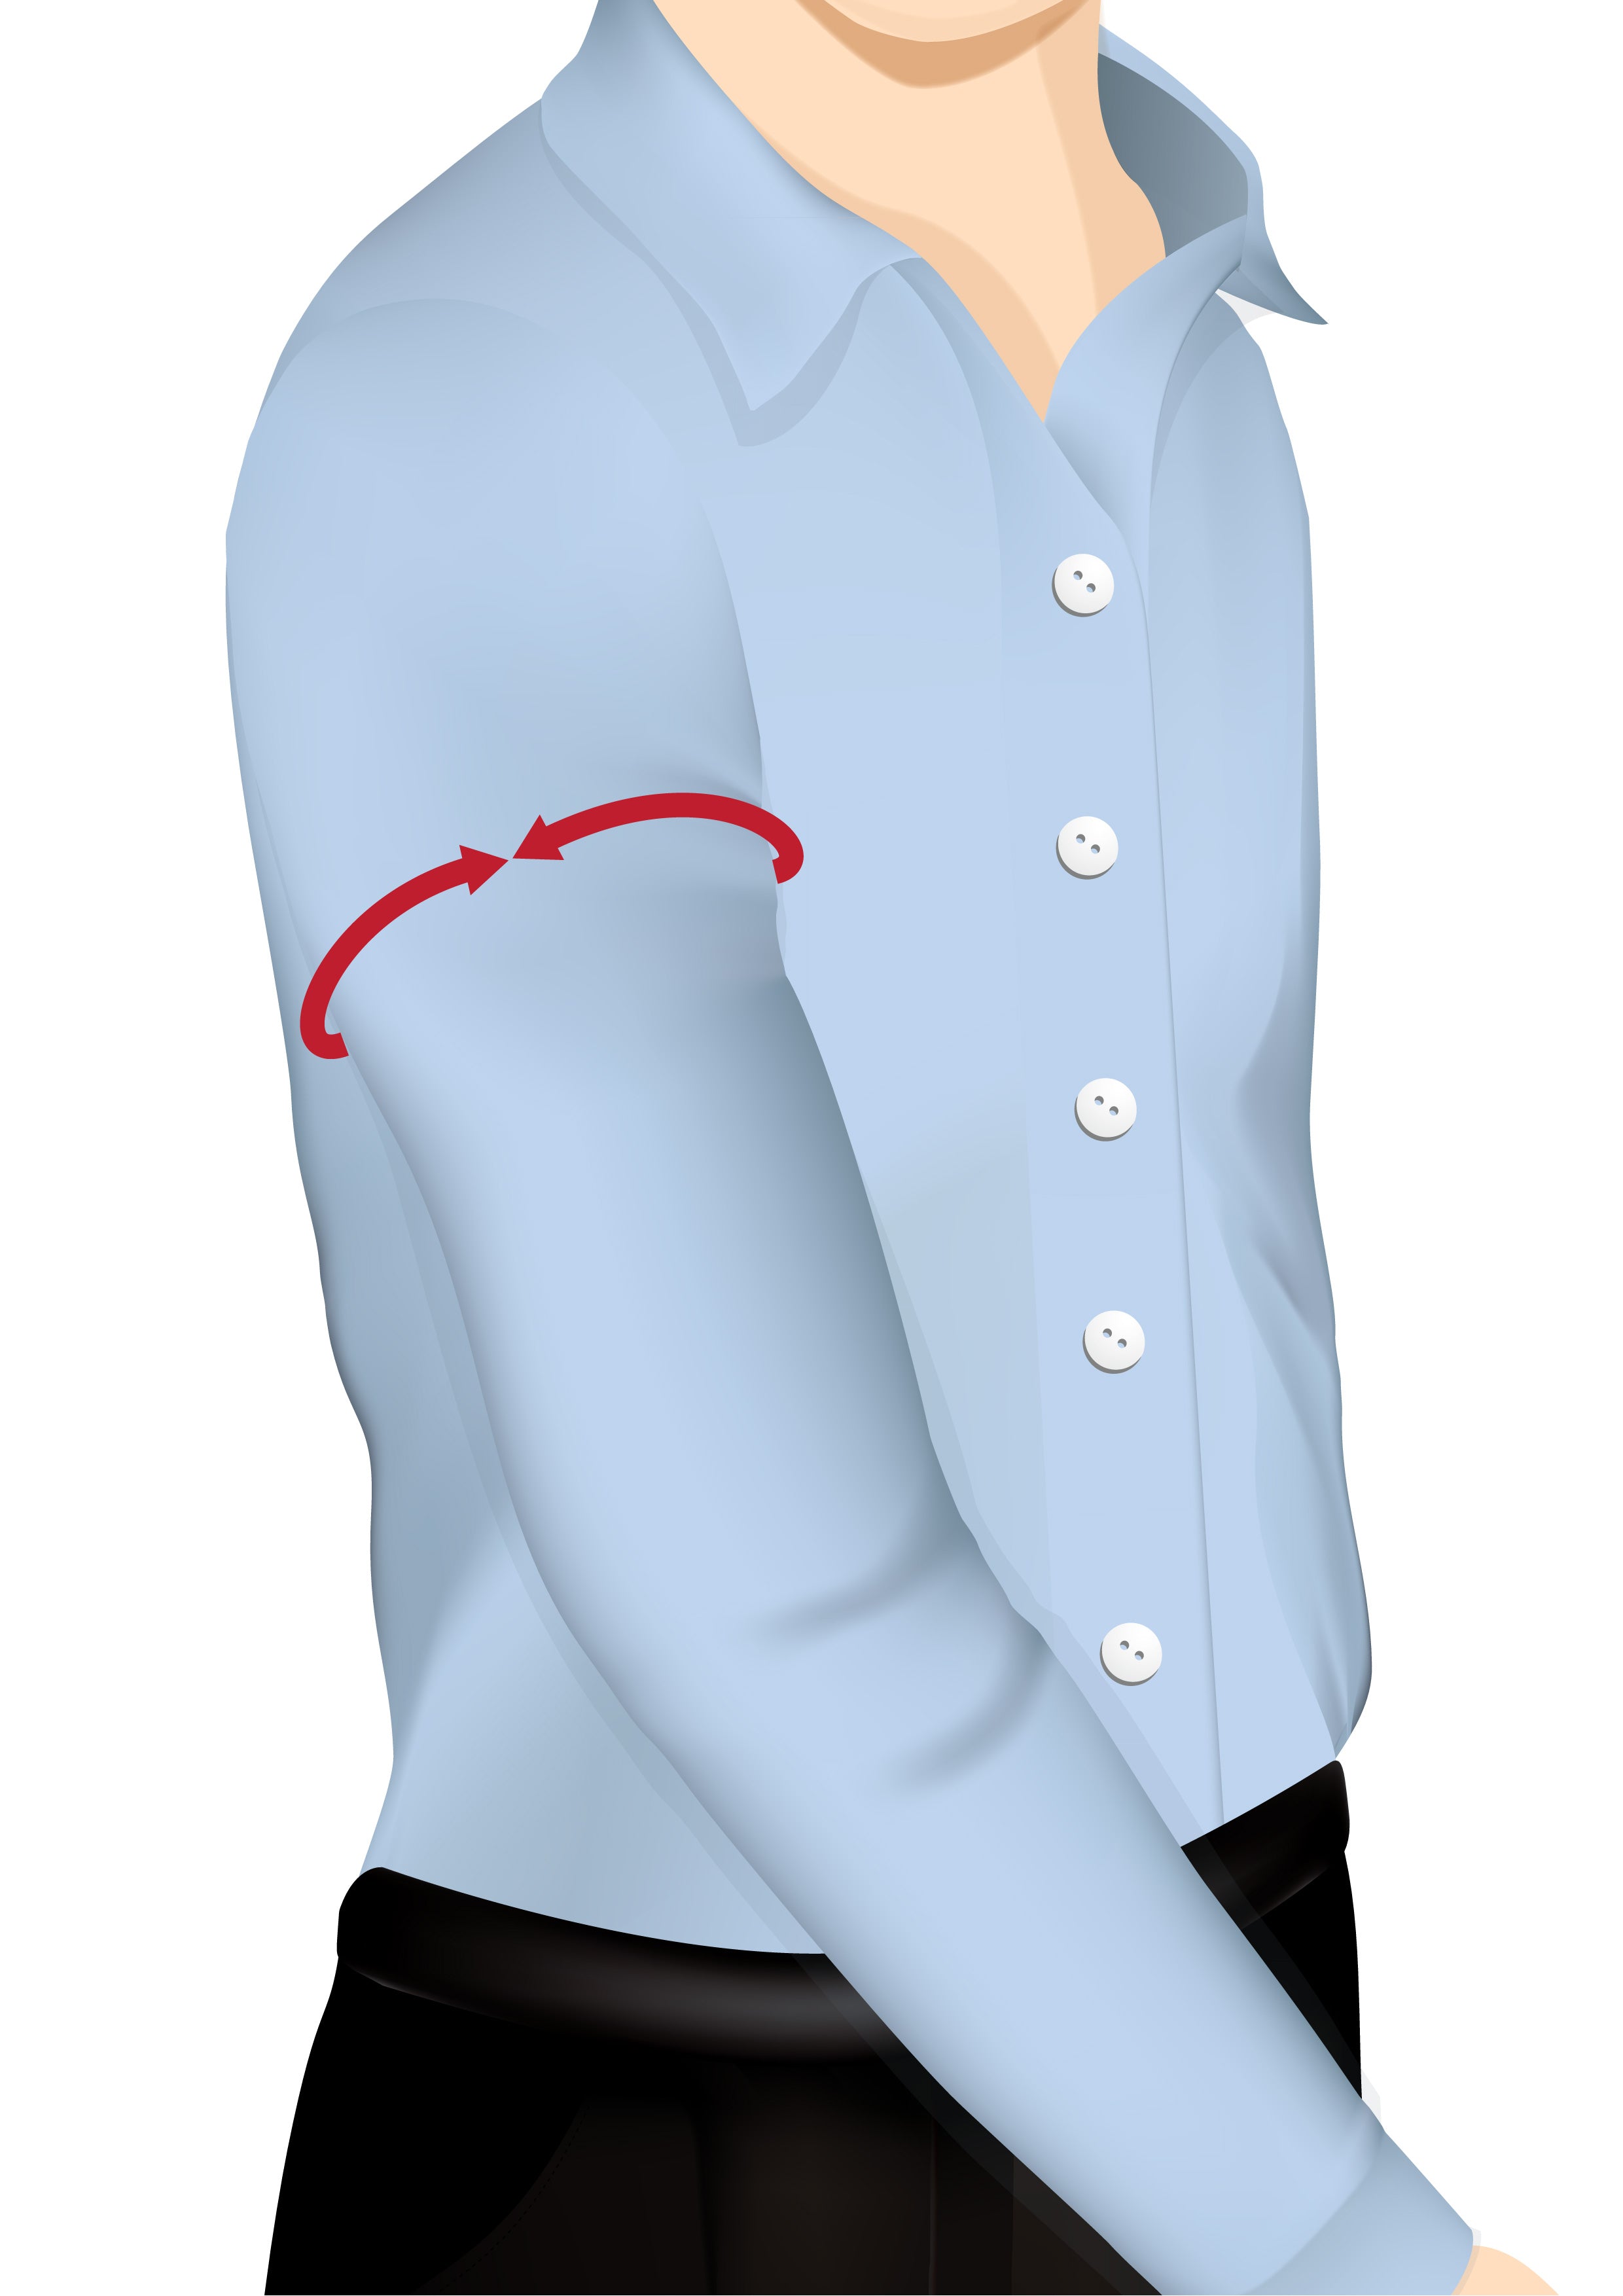
Bicep
This is an optional measurement. It is particularly important for body builders and weight lifters.
This measurement is recommended for a tailored fit or slim fit request for a more accurate fit.
Run the tape around the largest part of the bicep (usually 7” below the shoulder / sleeve seam). The bicep should be taken relaxed, not flexed.
This should be measured with a snug fit, but not tight.
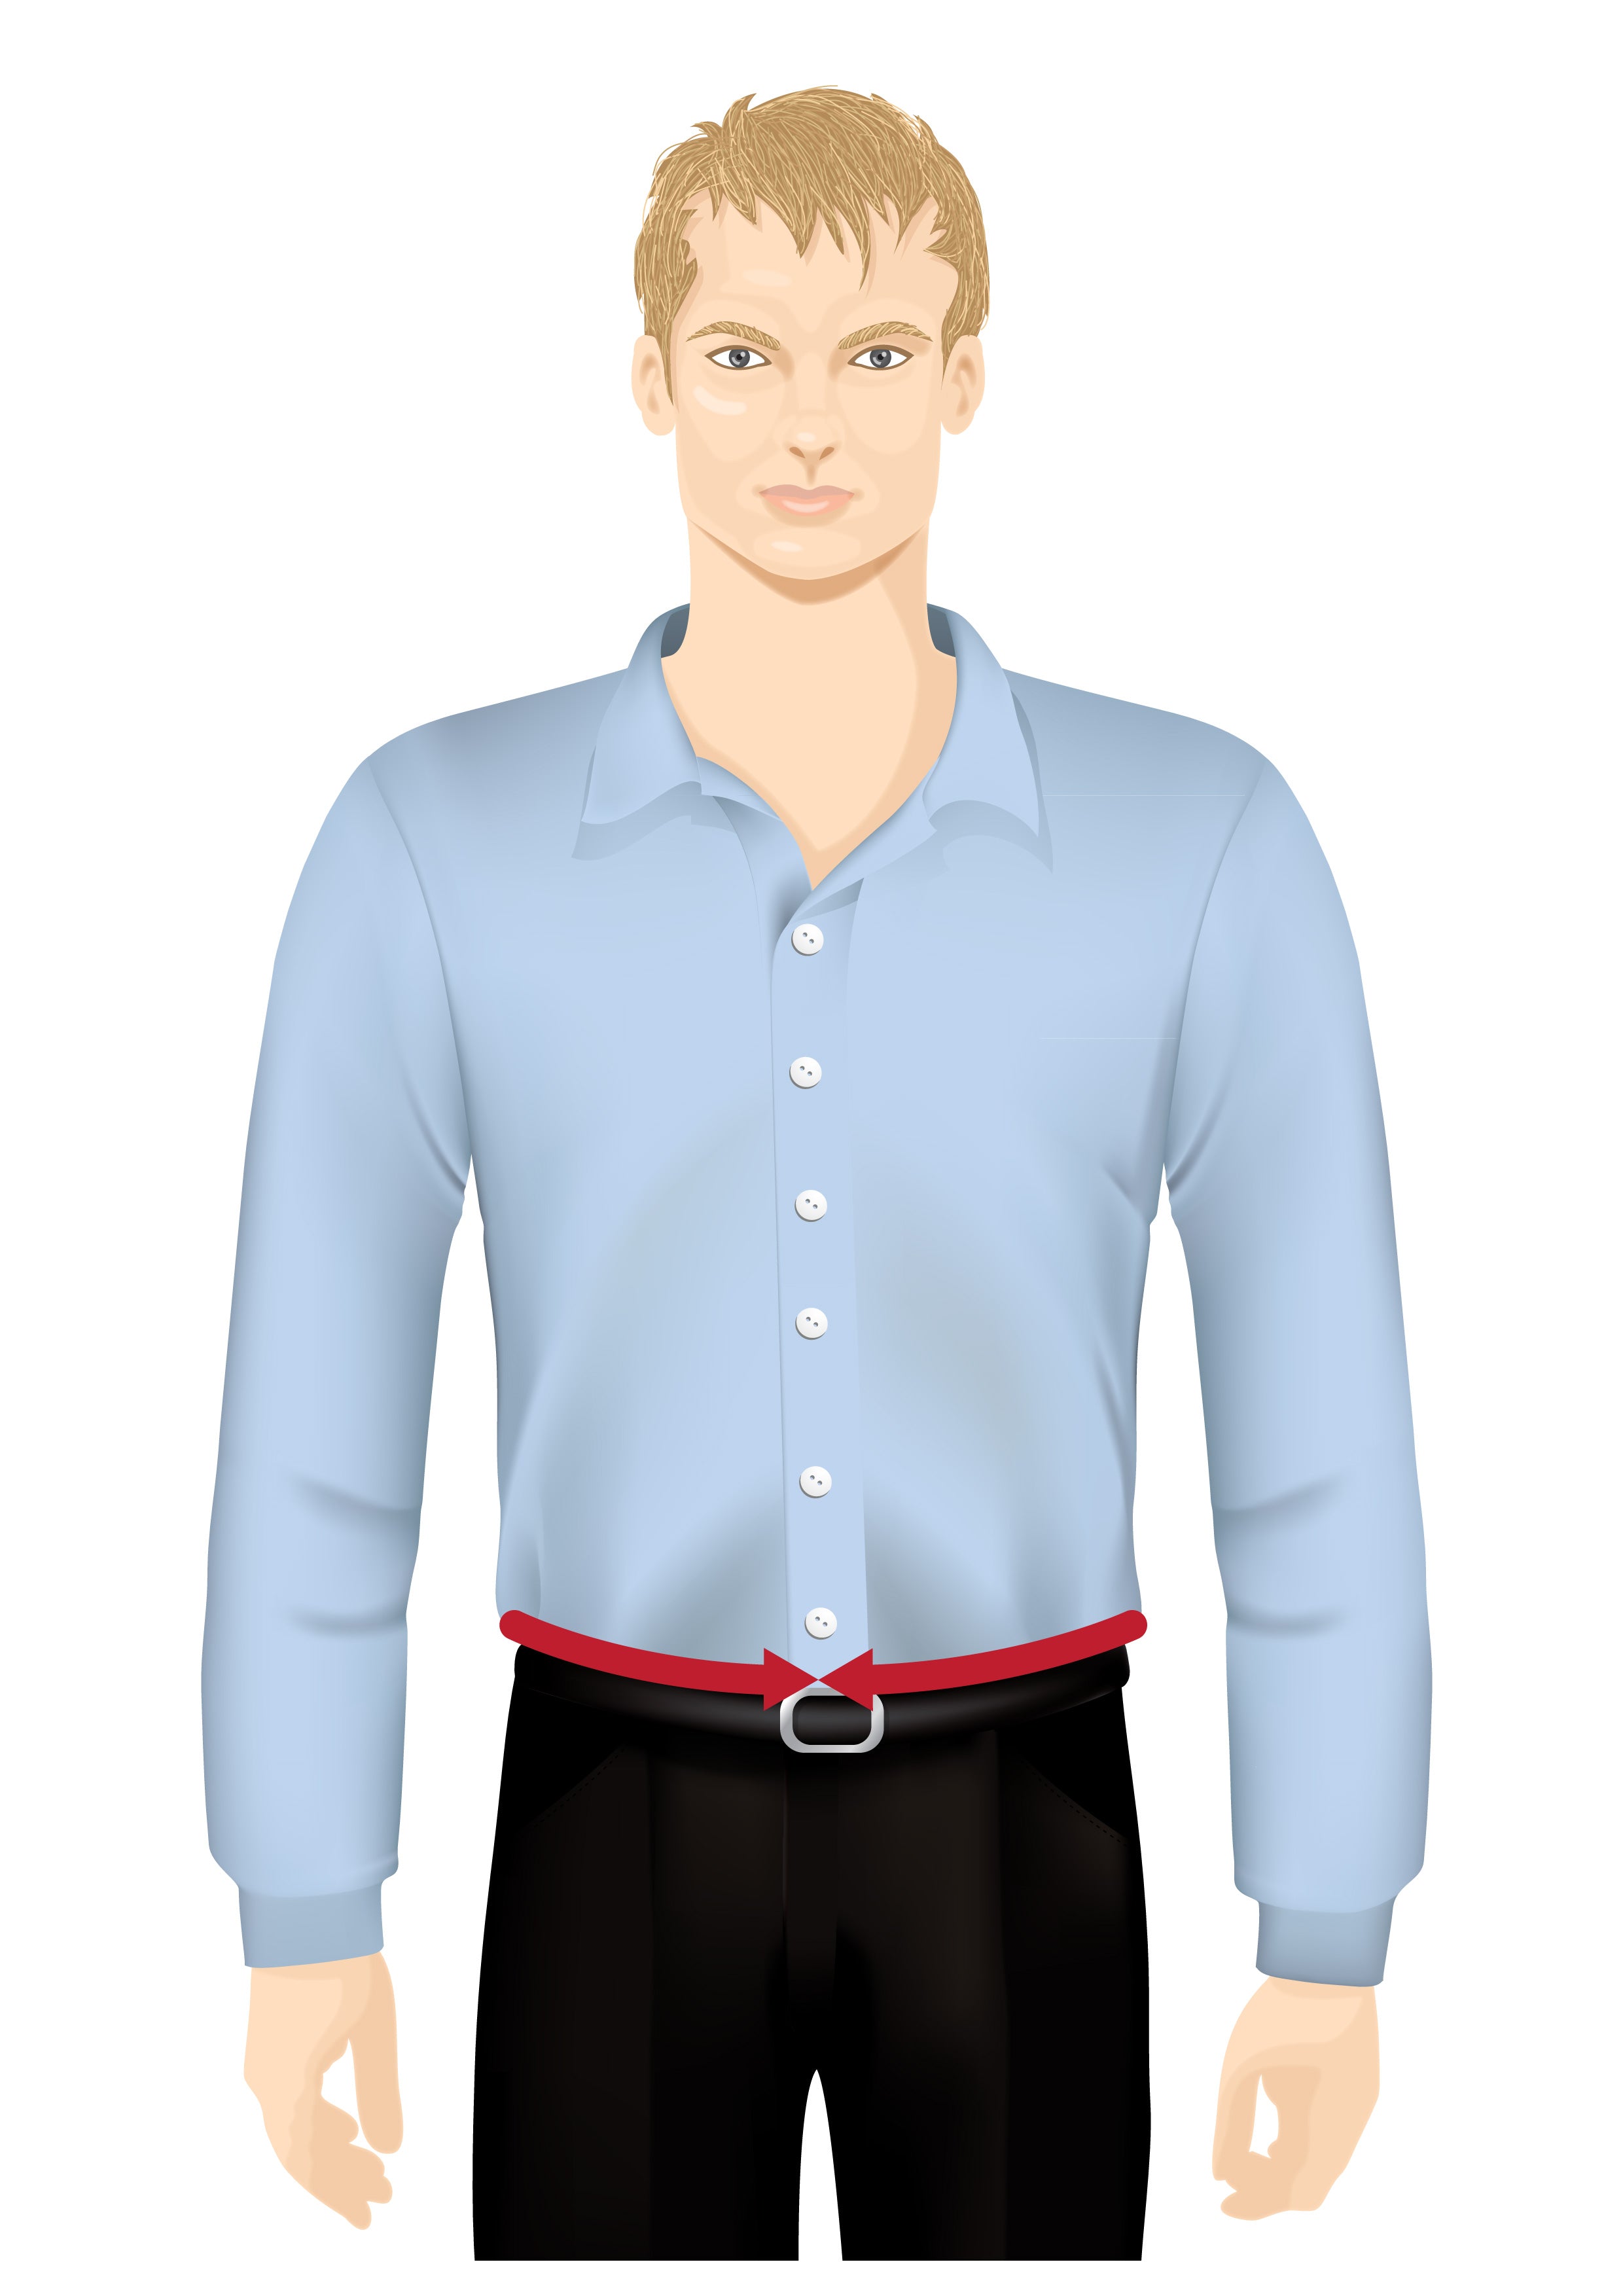
Trouser Waist
Run the tape horizontally around the waist where you typically wear your trousers.
This should be measured with a snug fit, but not uncomfortable.
Make sure the tape does not ride over or on top of the waistband, but you should be able to put your index finger inside the tape.
Tailoring Tip - As a guide, this measurement will be about 1 to 2 inches larger what you take off-the-rack.
Tailoring Tip - If you like to wear a low waisted trouser, be sure to take the measurement from the particular area.
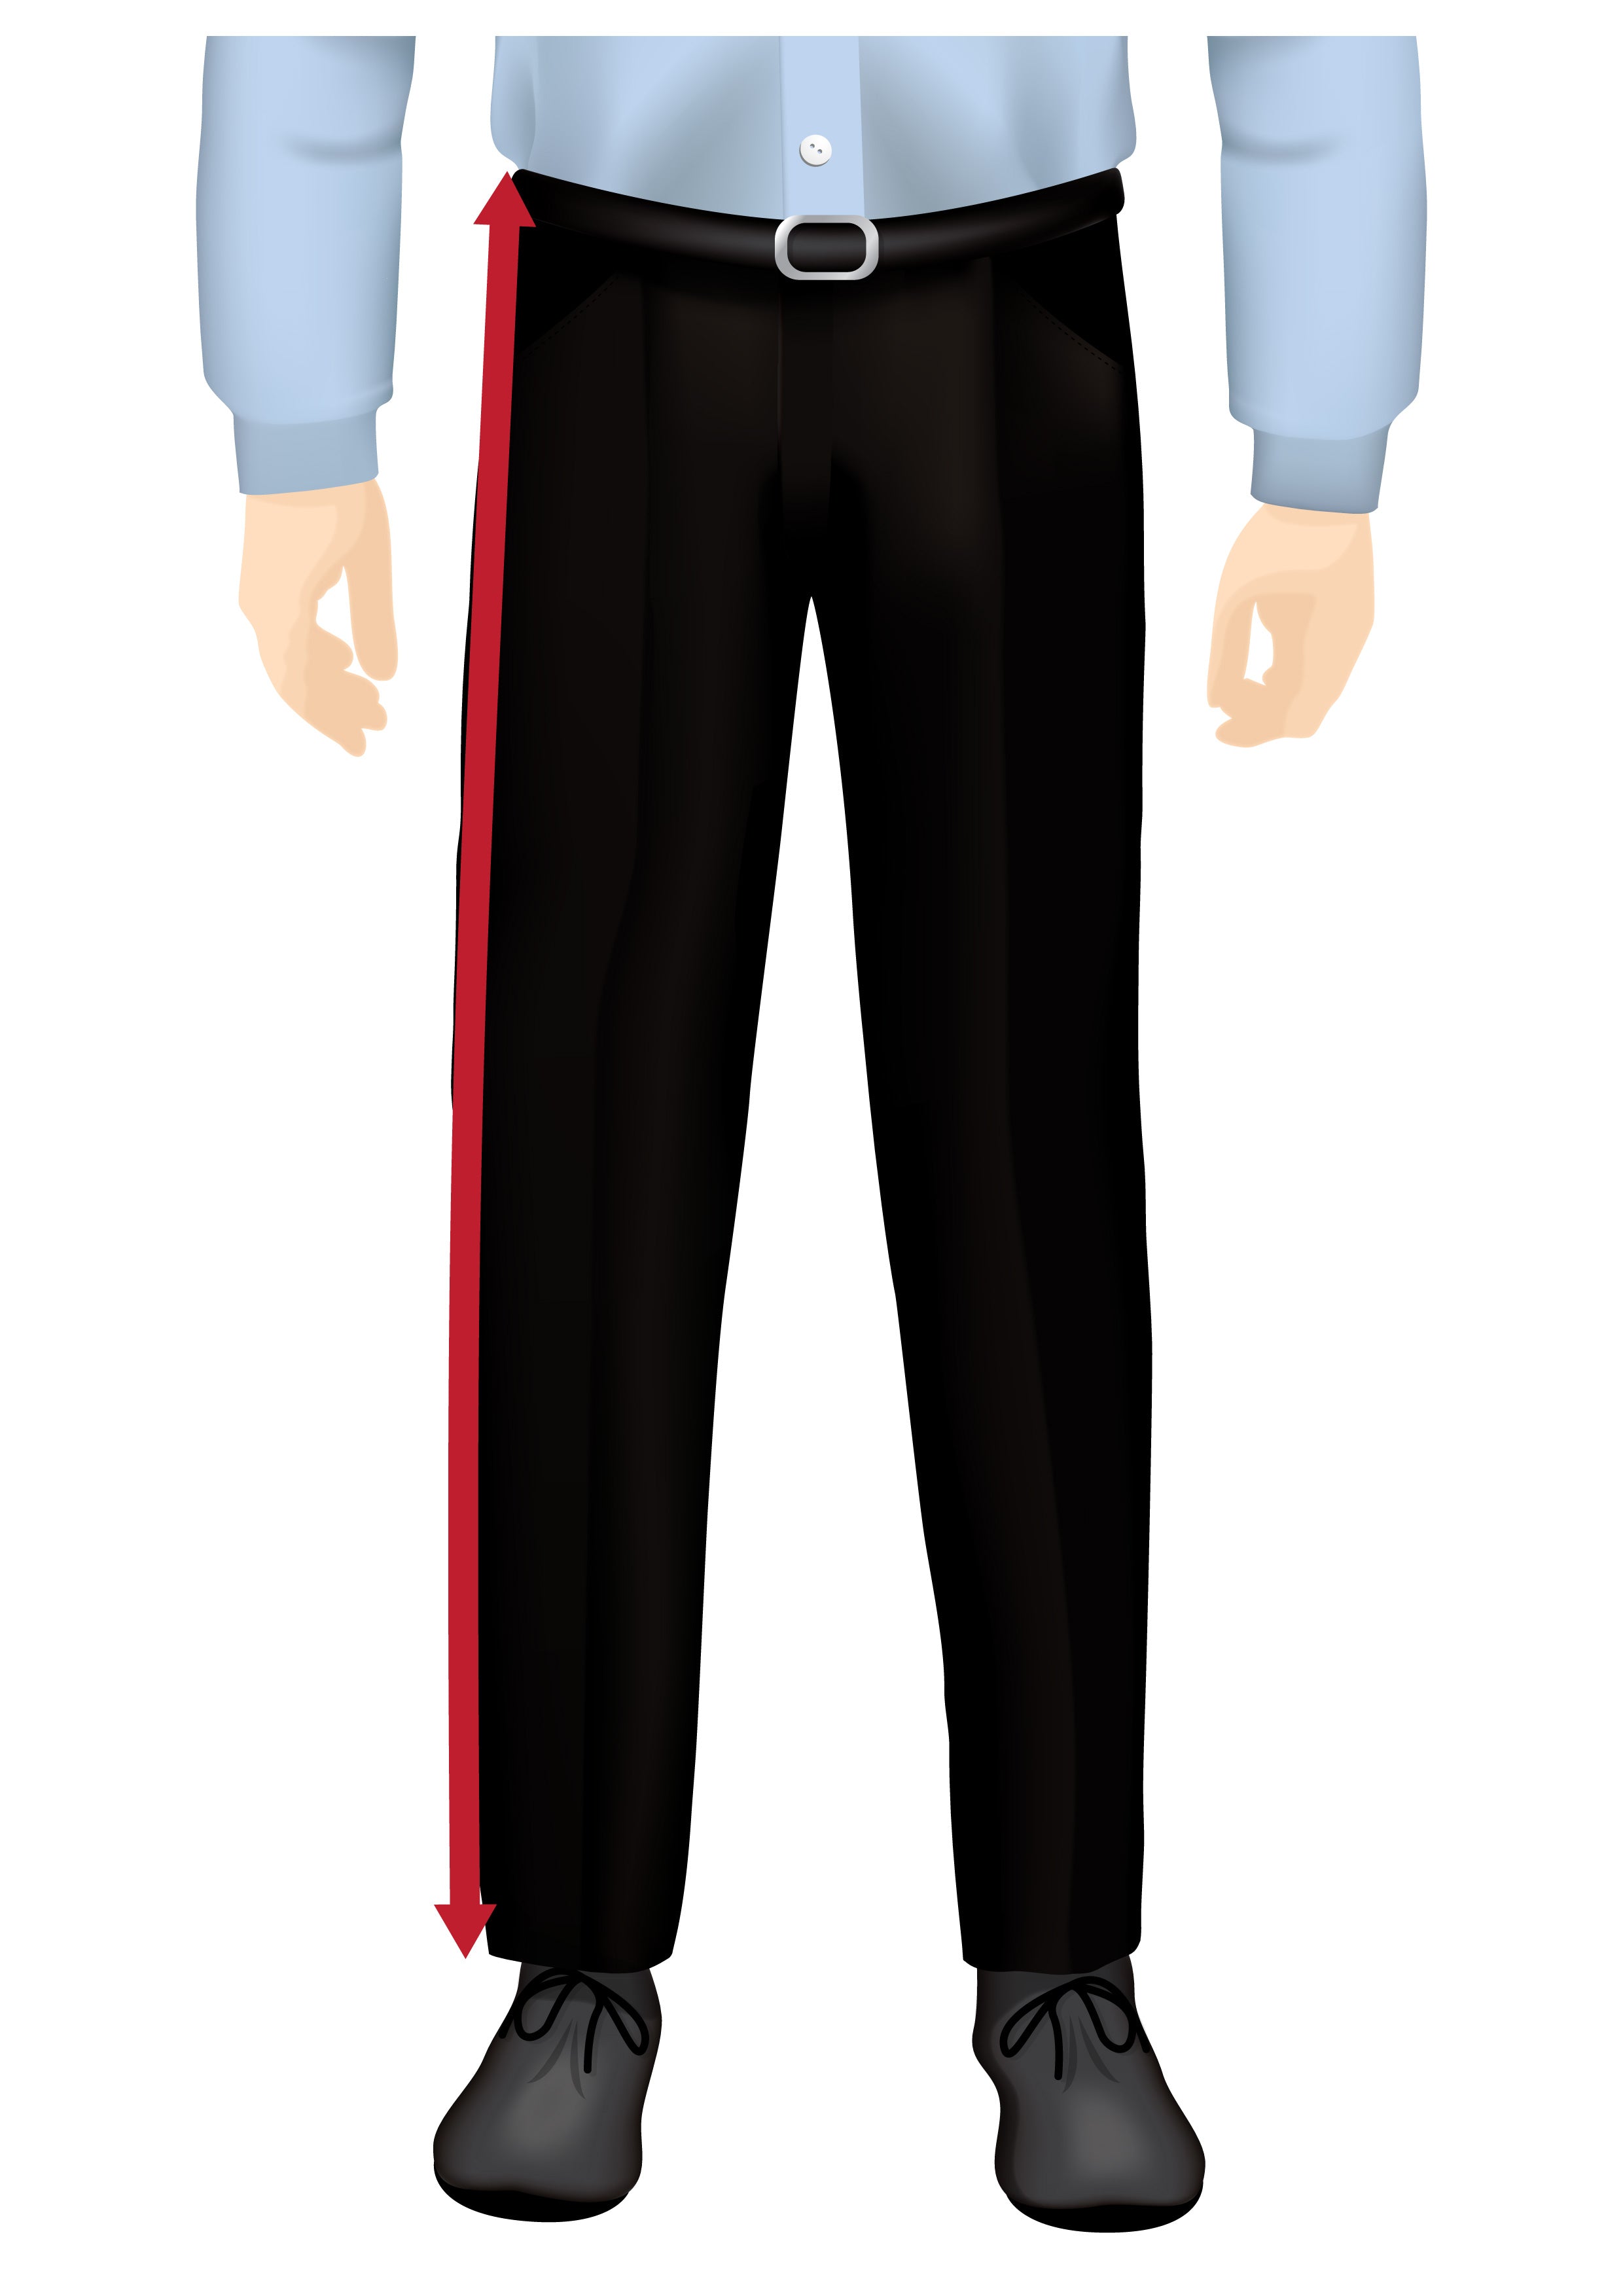
Trouser Length
Run the tape from the top of the trousers waistband, keeping the tape measure pulled tight, down to where you wish the bottom of the trousers to end.
Make sure, while measuring, to stand up straight, not be looking down as this will affect the measurement.
Tailoring Tip - Keep in mind, for tailored and slim fitting pants, the measurement needs to be slightly shorter than standard (no break) to achieve the desired look.
Tailoring Tip - As a general rule of thumb, for standard fitting trousers, run the tape from the waistband to the floor and subtract 1.5”.
Tailoring Tip - Please do not measure while wearing jeans or track pants. Jeans, and other casual wear, are traditionally worn lower waisted, rather than dress trousers.
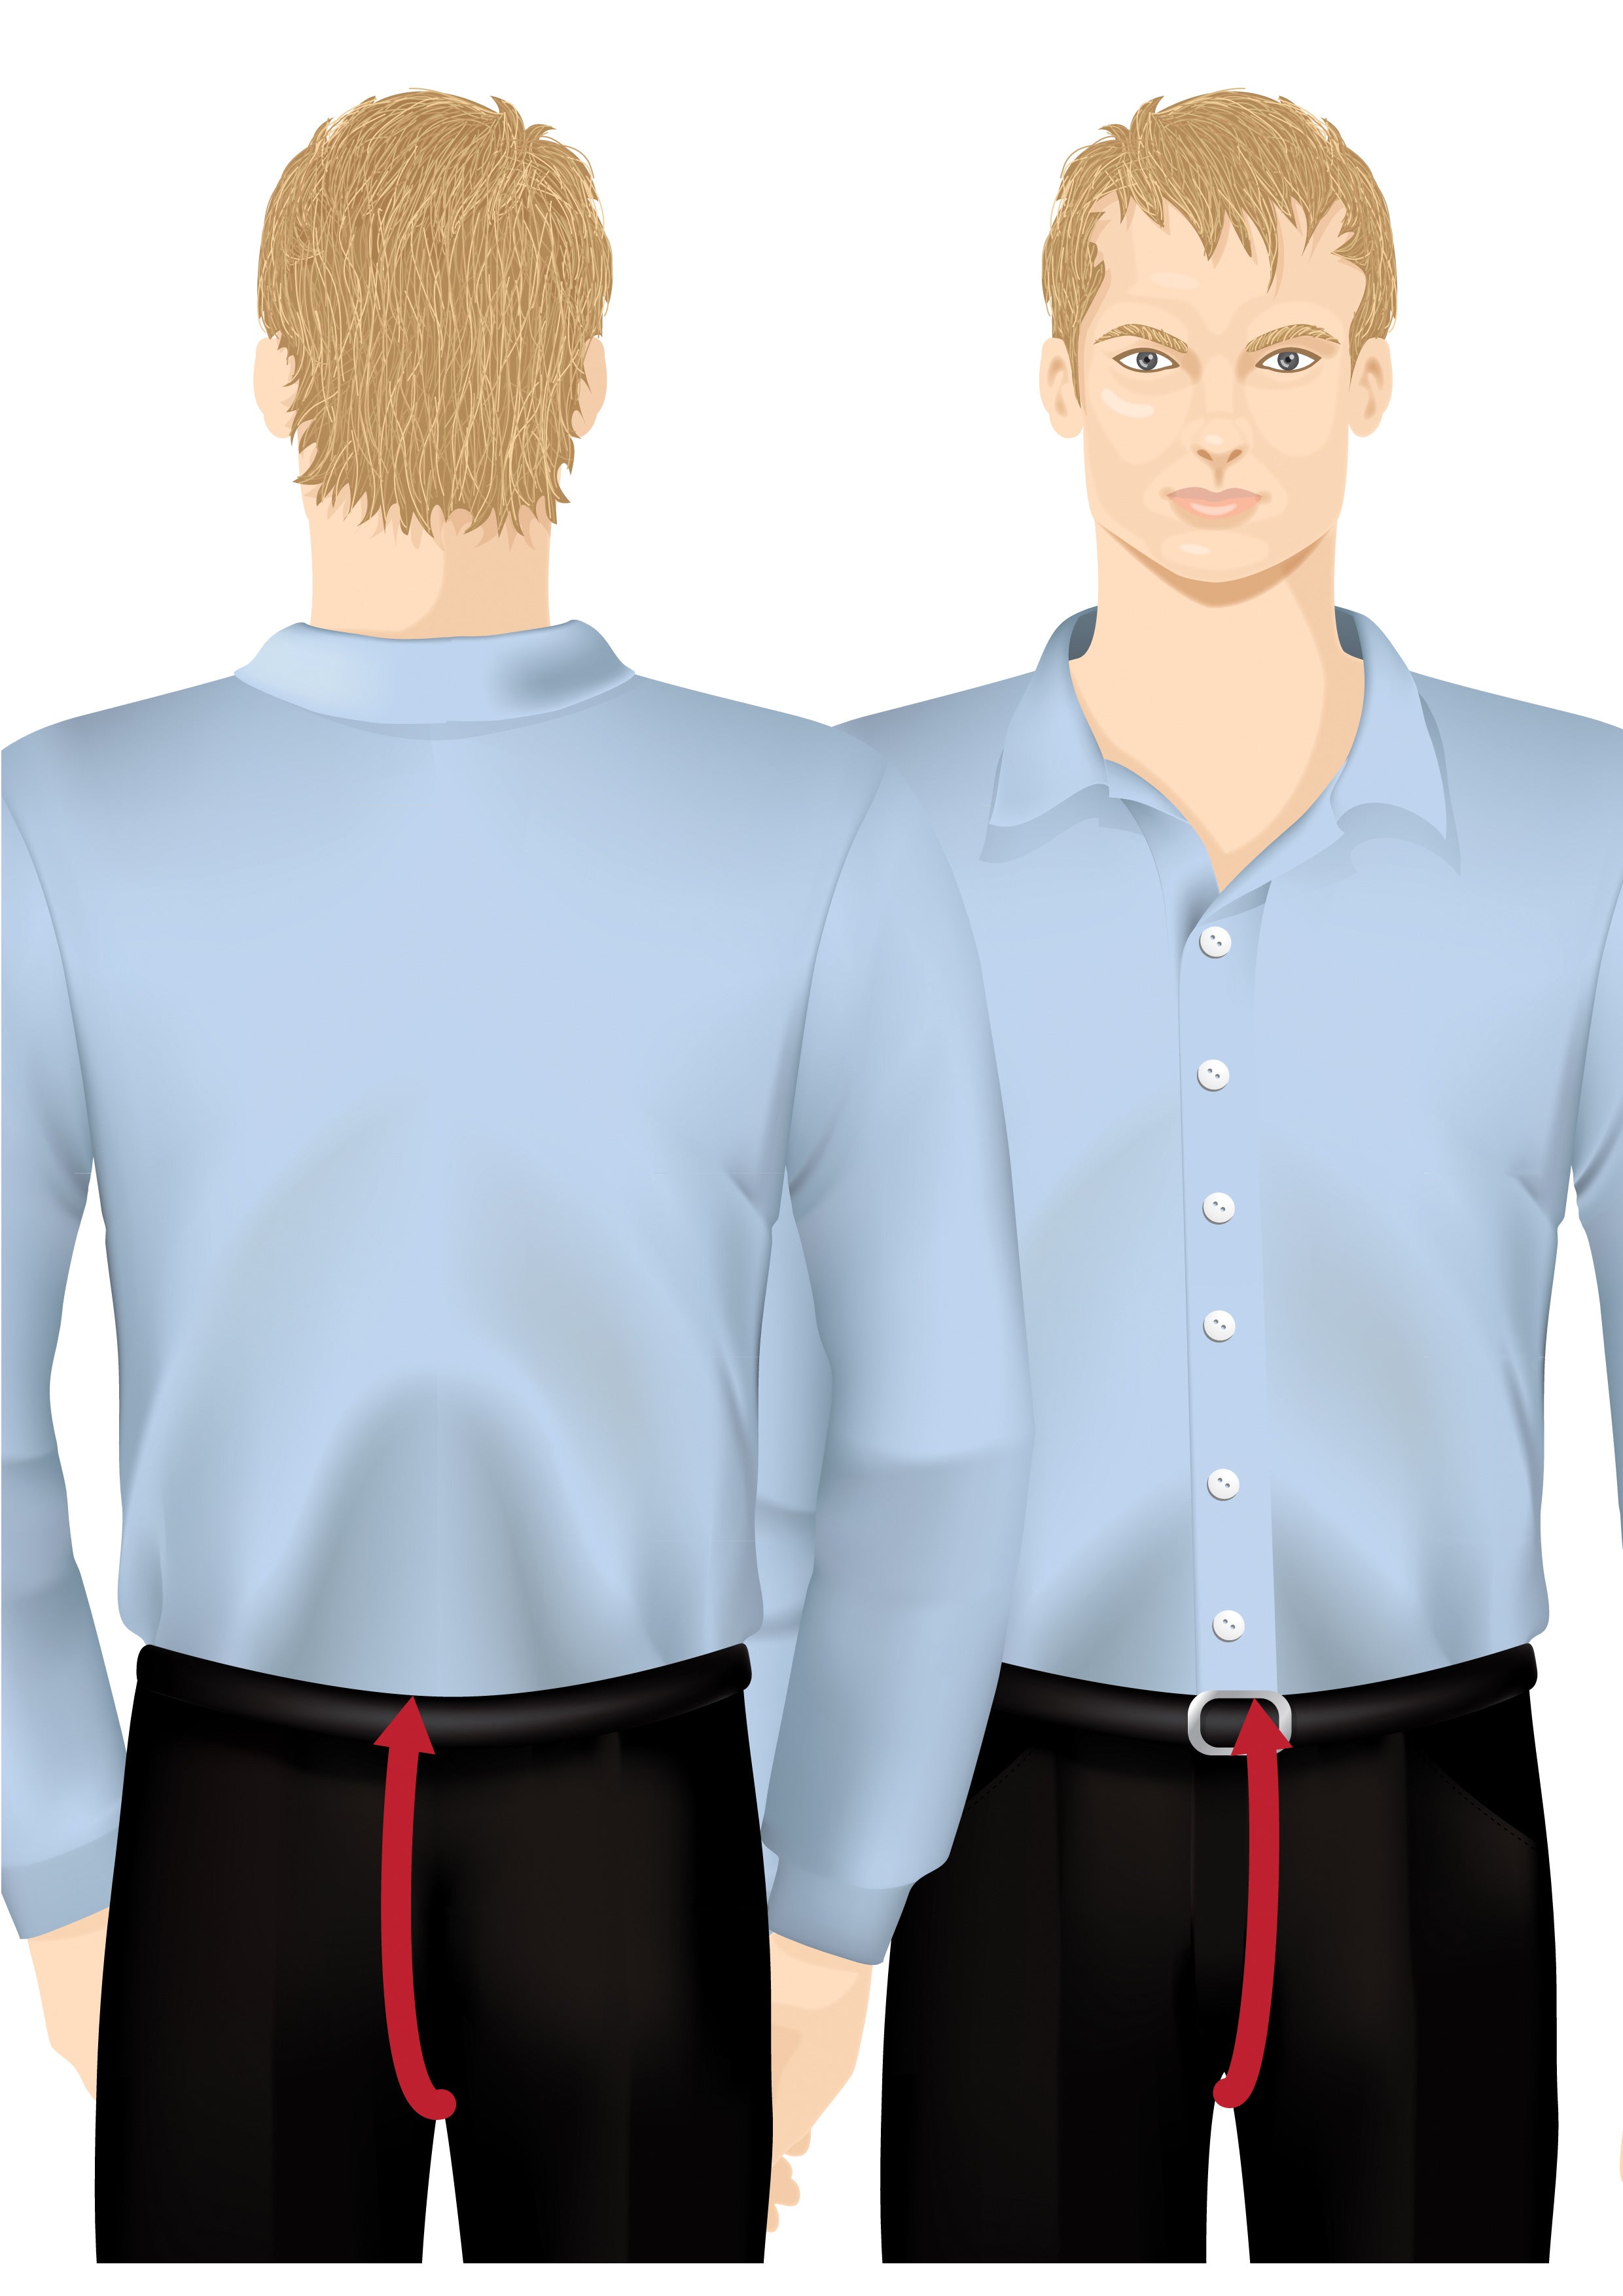
Saddle (Full Crotch)
This is a recommended measurement, as it tends to provide a very accurate fit if measured correctly. This should be measured with a comfortable fit, not snug.
Run the tape from the top of the trouser waistband at the front, between the legs, to top of the waistband at the back. Allow as much space as needed for comfort.
If the wearer likes to wear a low waisted pant, be sure to take the measurement from the lower waist point.
Tailoring Tip - Please do not measure while wearing jeans or track pants. Jeans, and other casual wear, are traditionally worn lower waisted, rather than dress trousers.
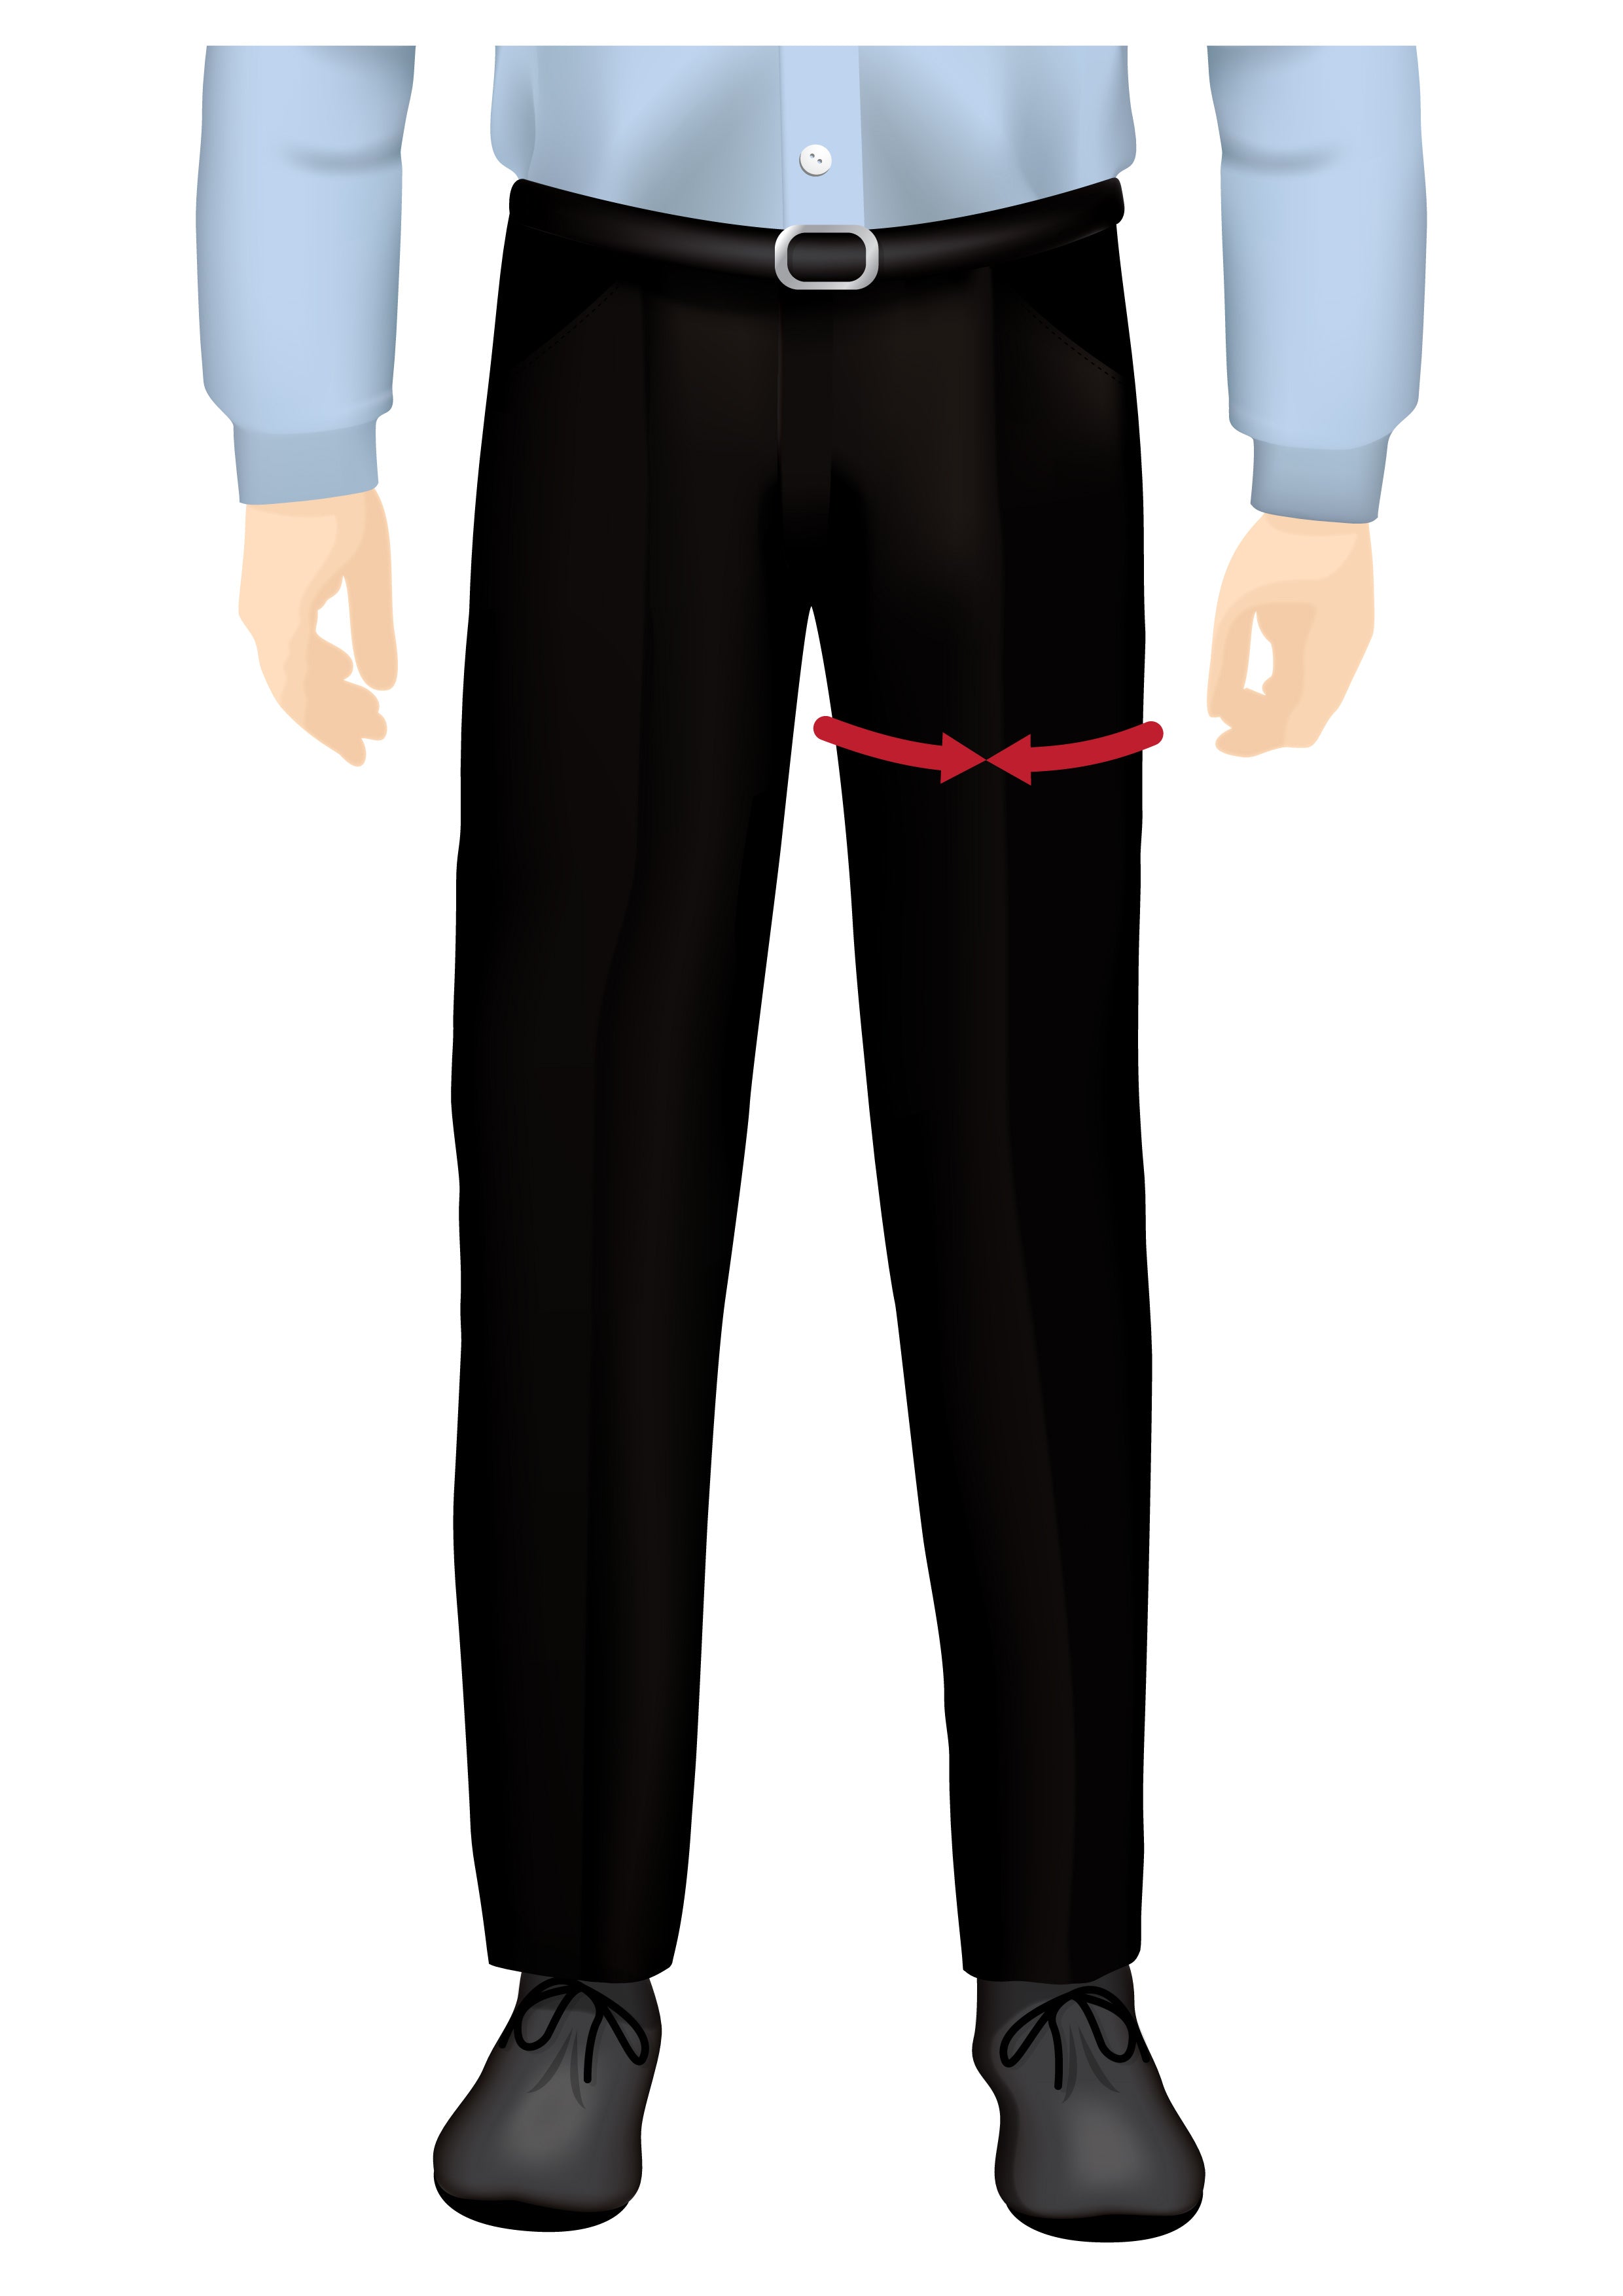
Thigh
Measure around the fullest part of your thigh. Keep the tape measure snug, but not tight.
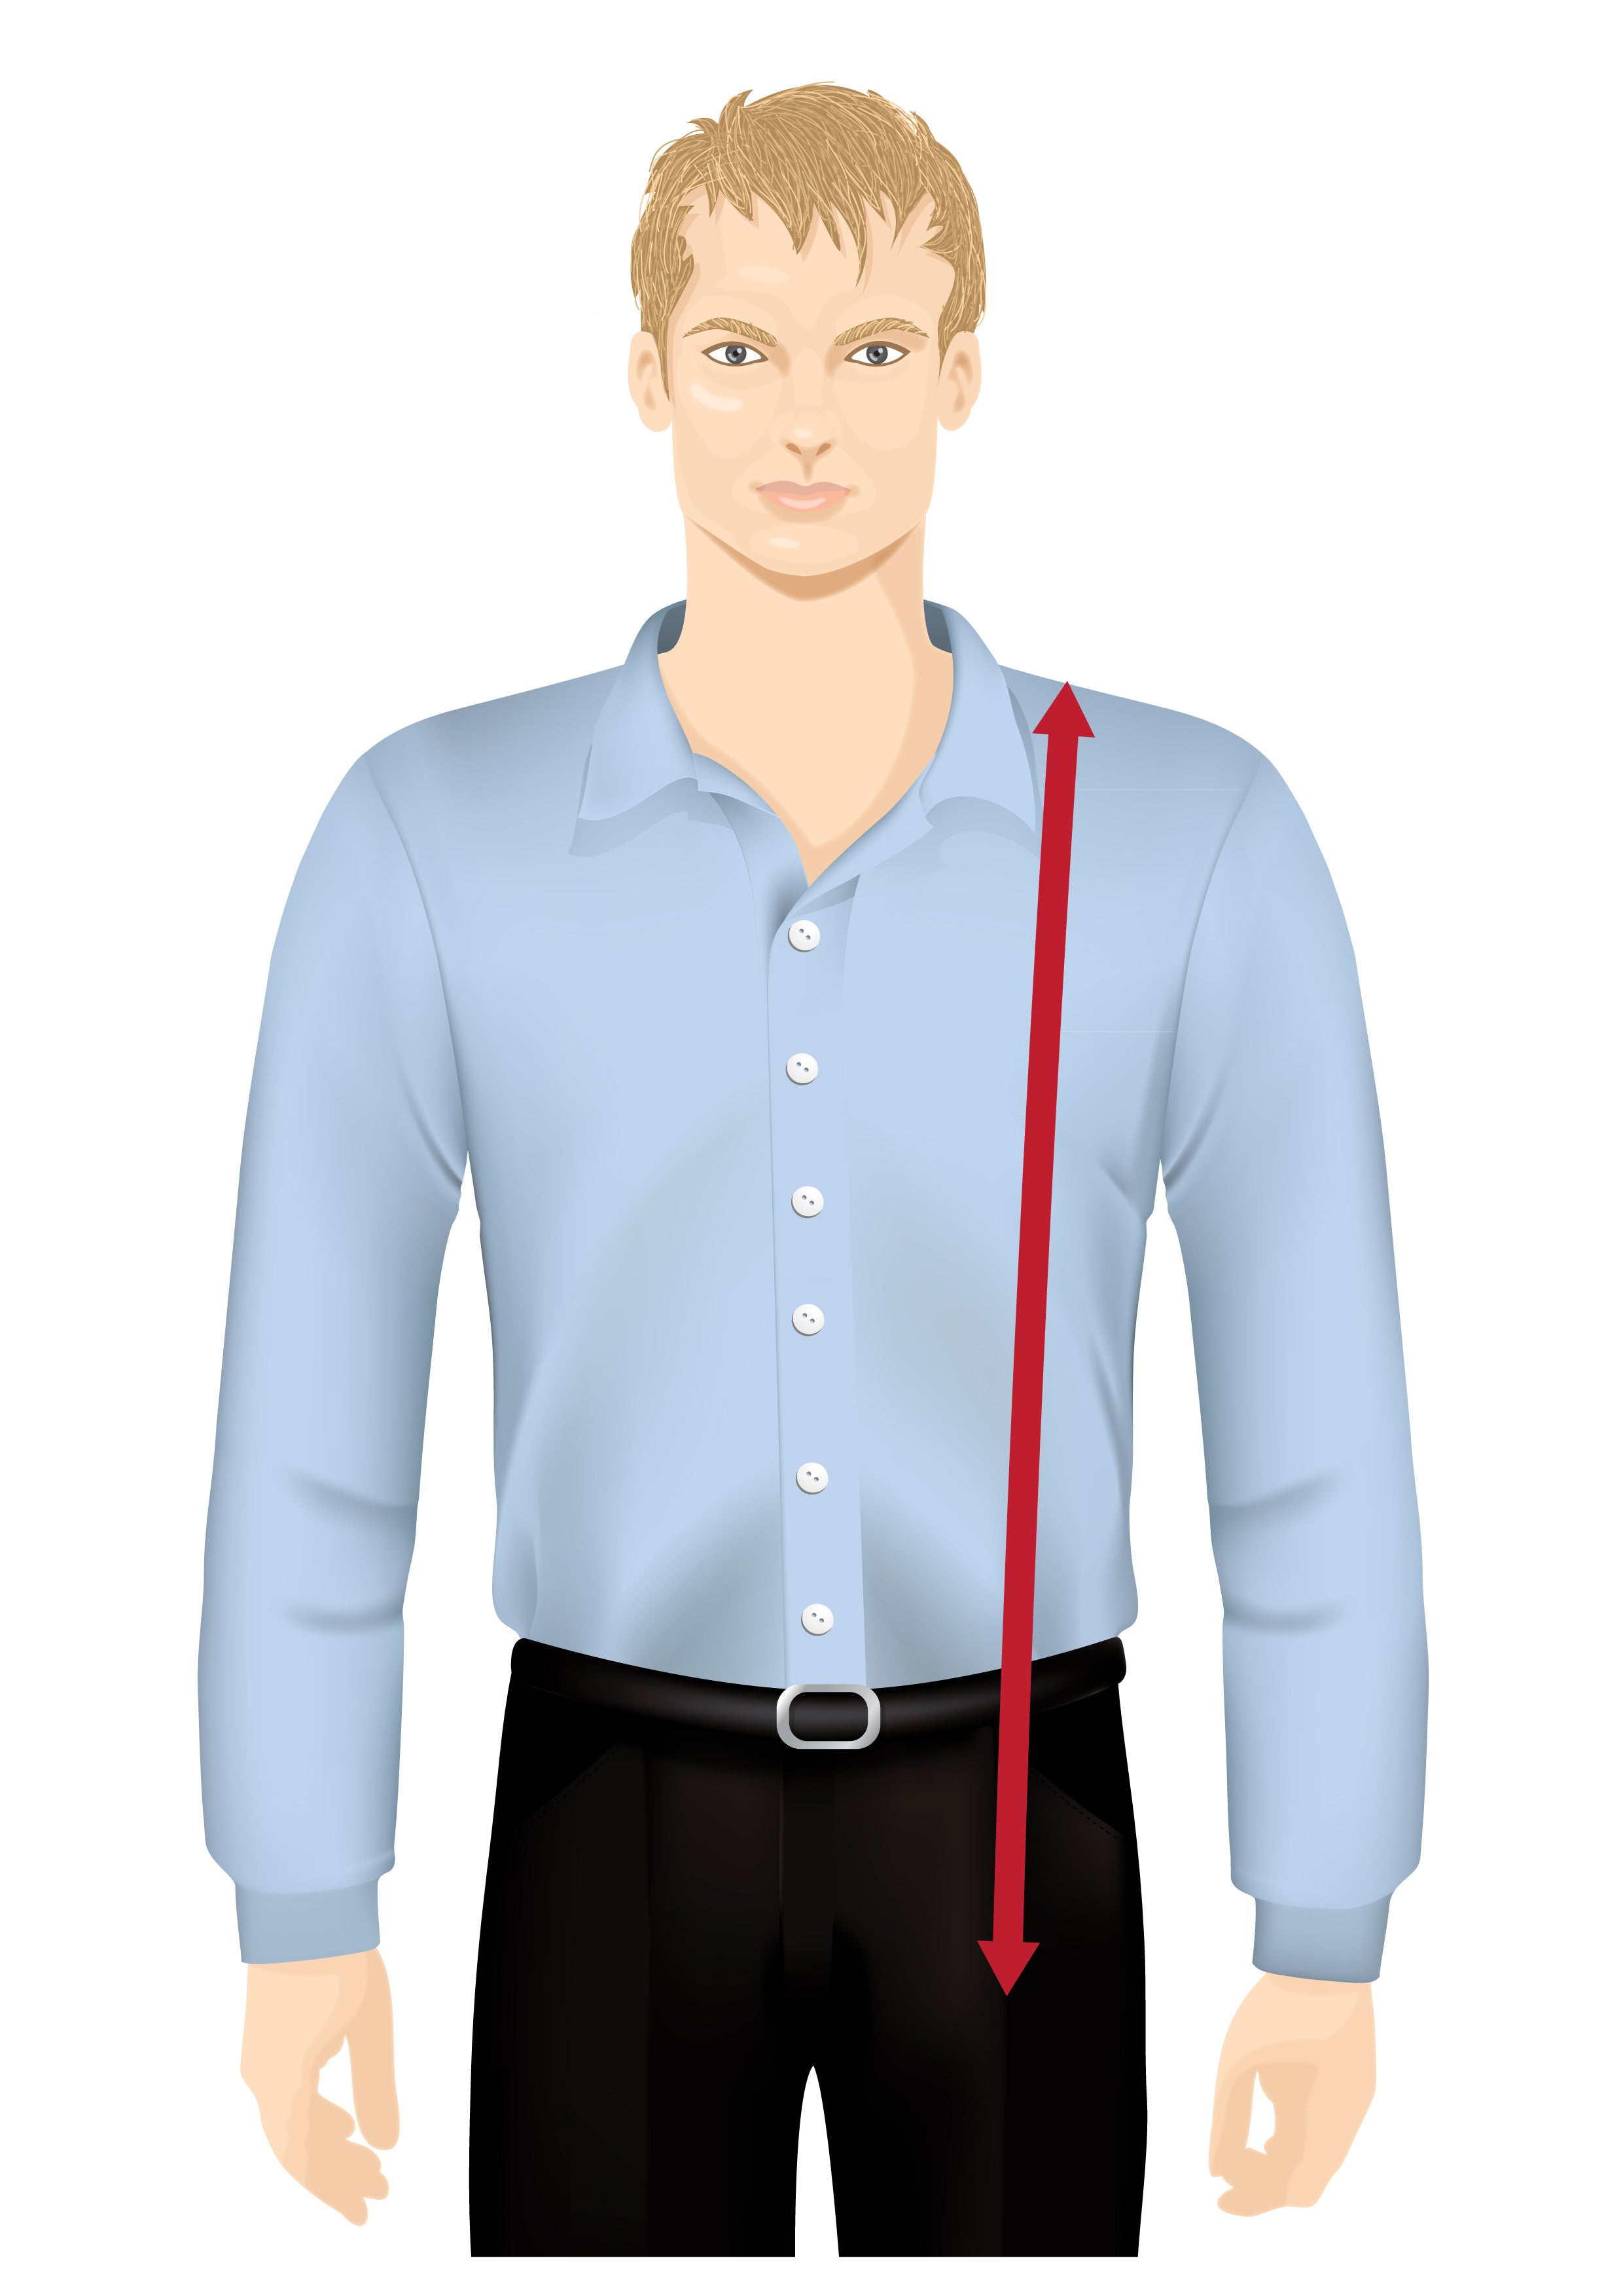
Shirt Front Length
Run the tape vertically from the shirt shoulder seam down the front length, where the shirt needs to end.
If you are unsure of the perfect length it is generally accepted to be roughly 6” below the belt line (bottom of pant waistband).
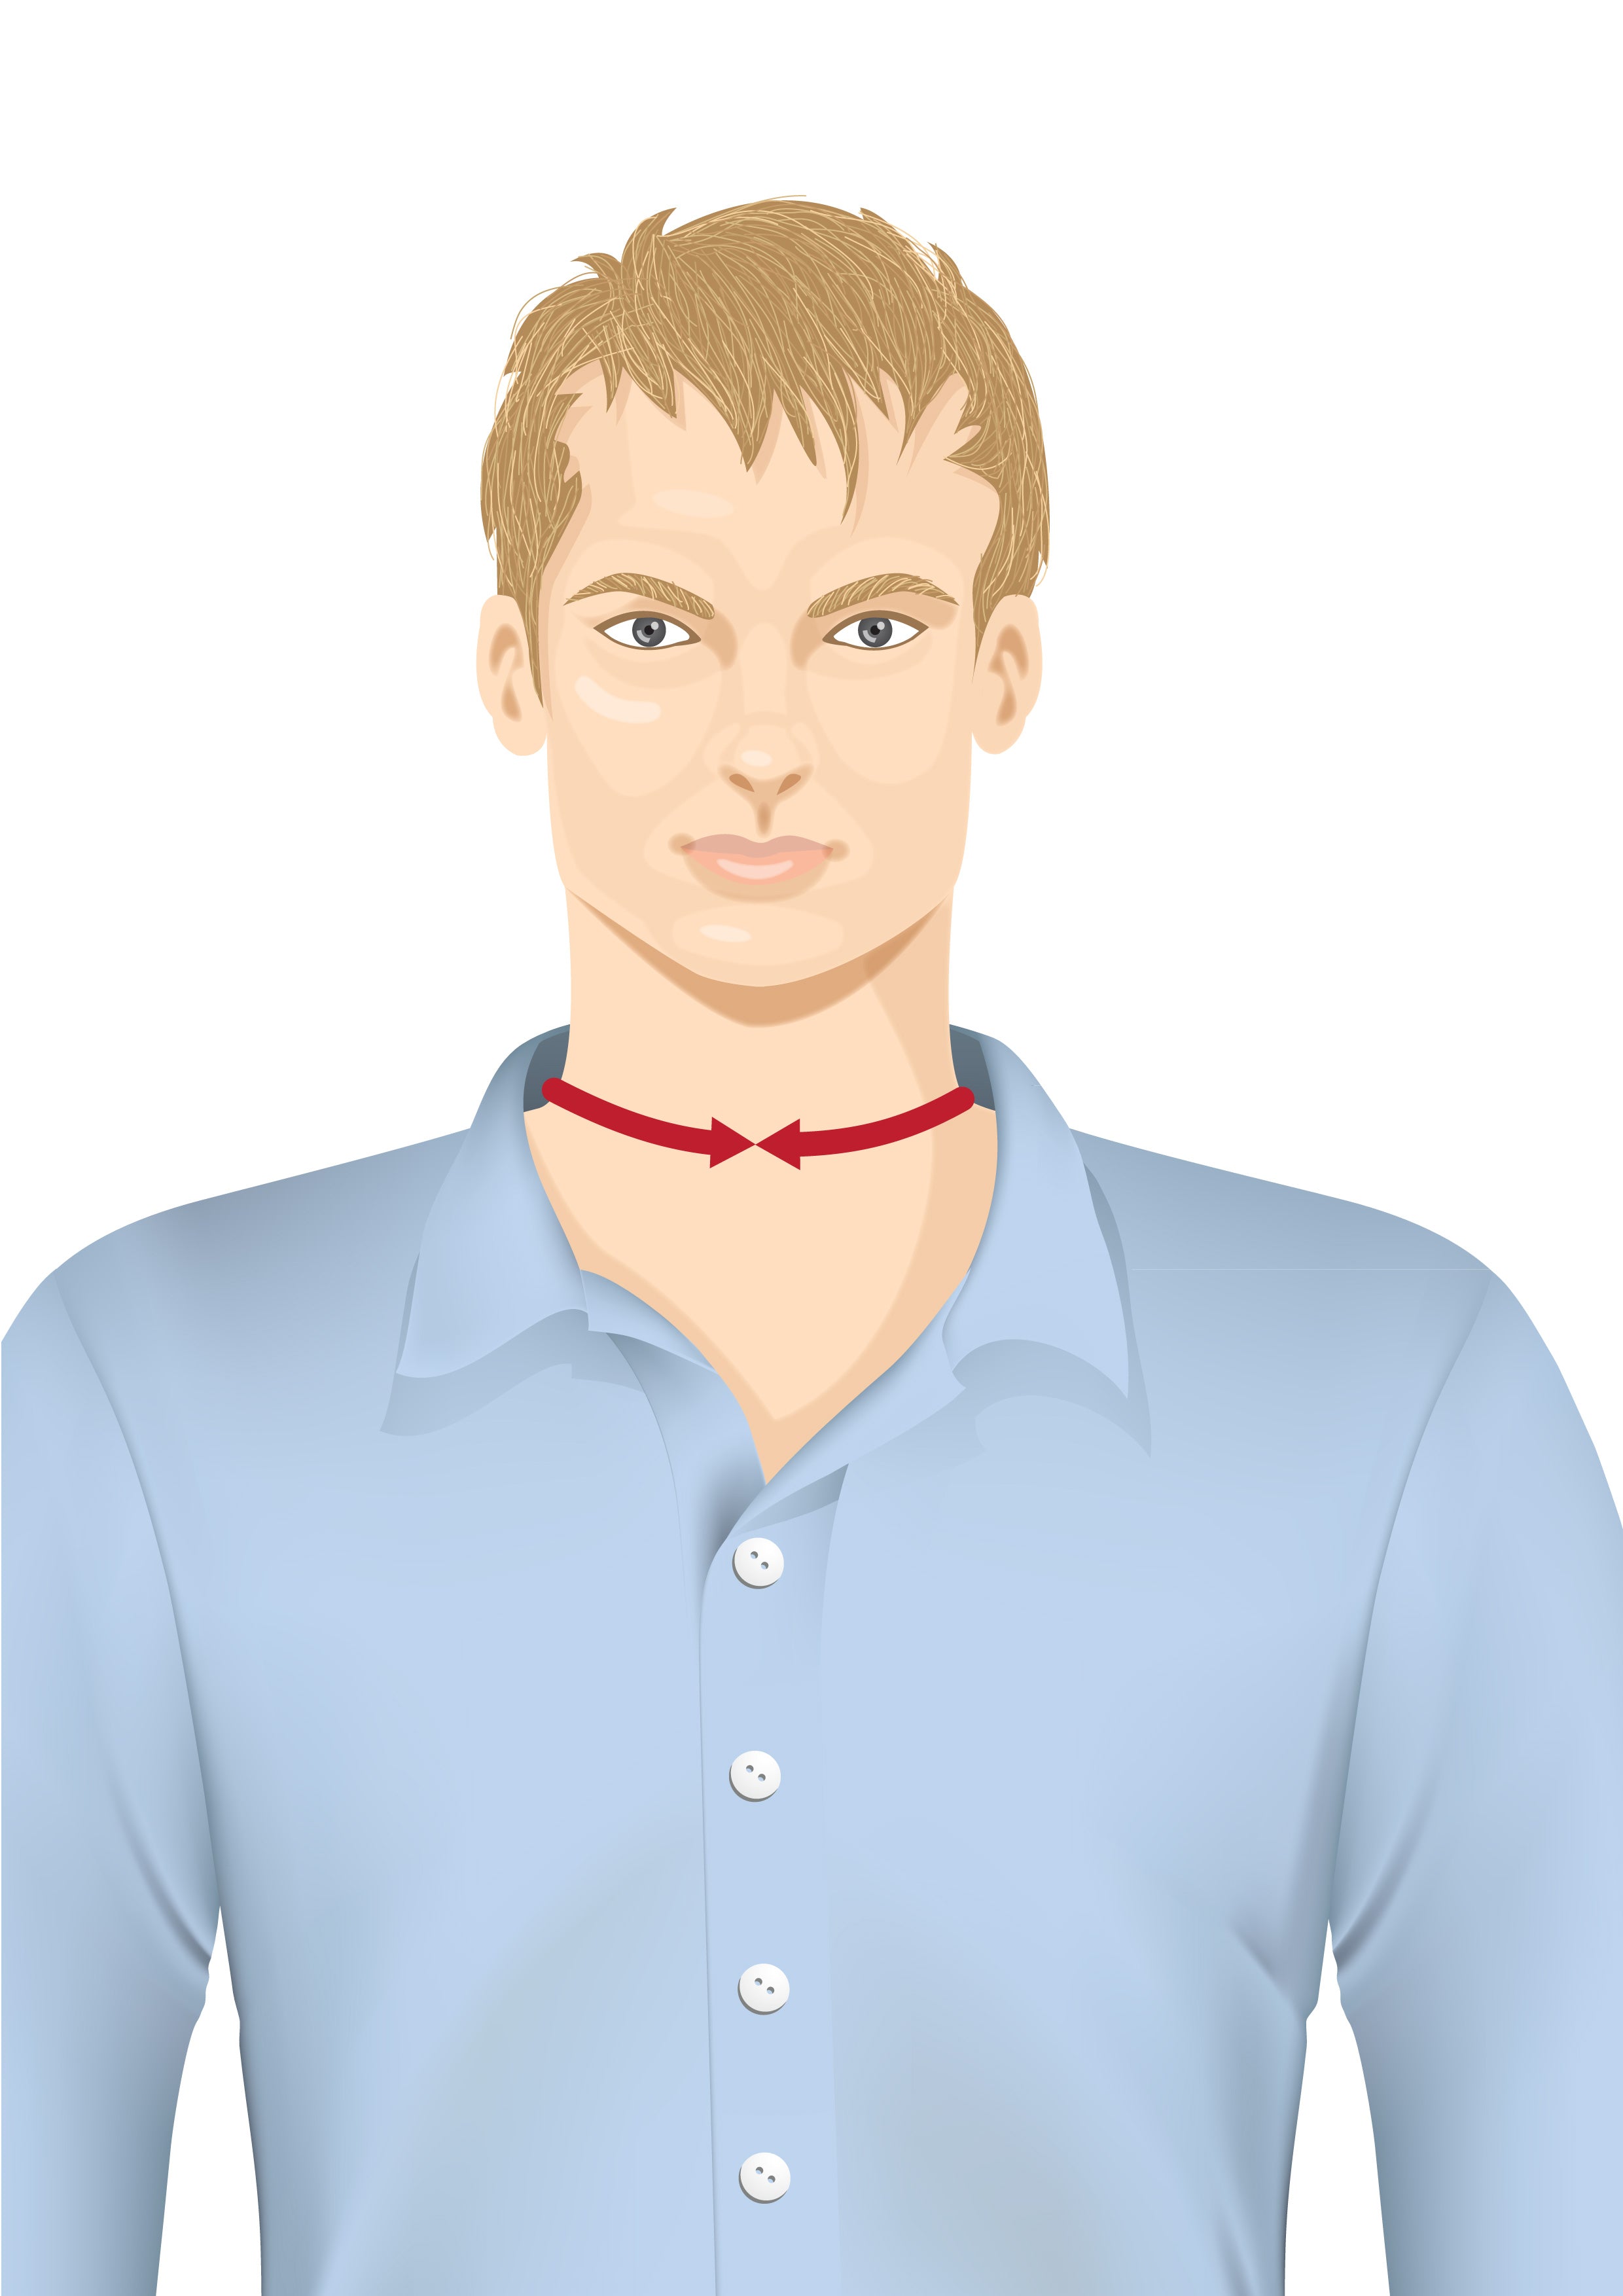
Shirt Collar (Neck)
Run the tape around the base of the neck where the collar would naturally sit. Keep a finger space between the tape and your neck for comfort.
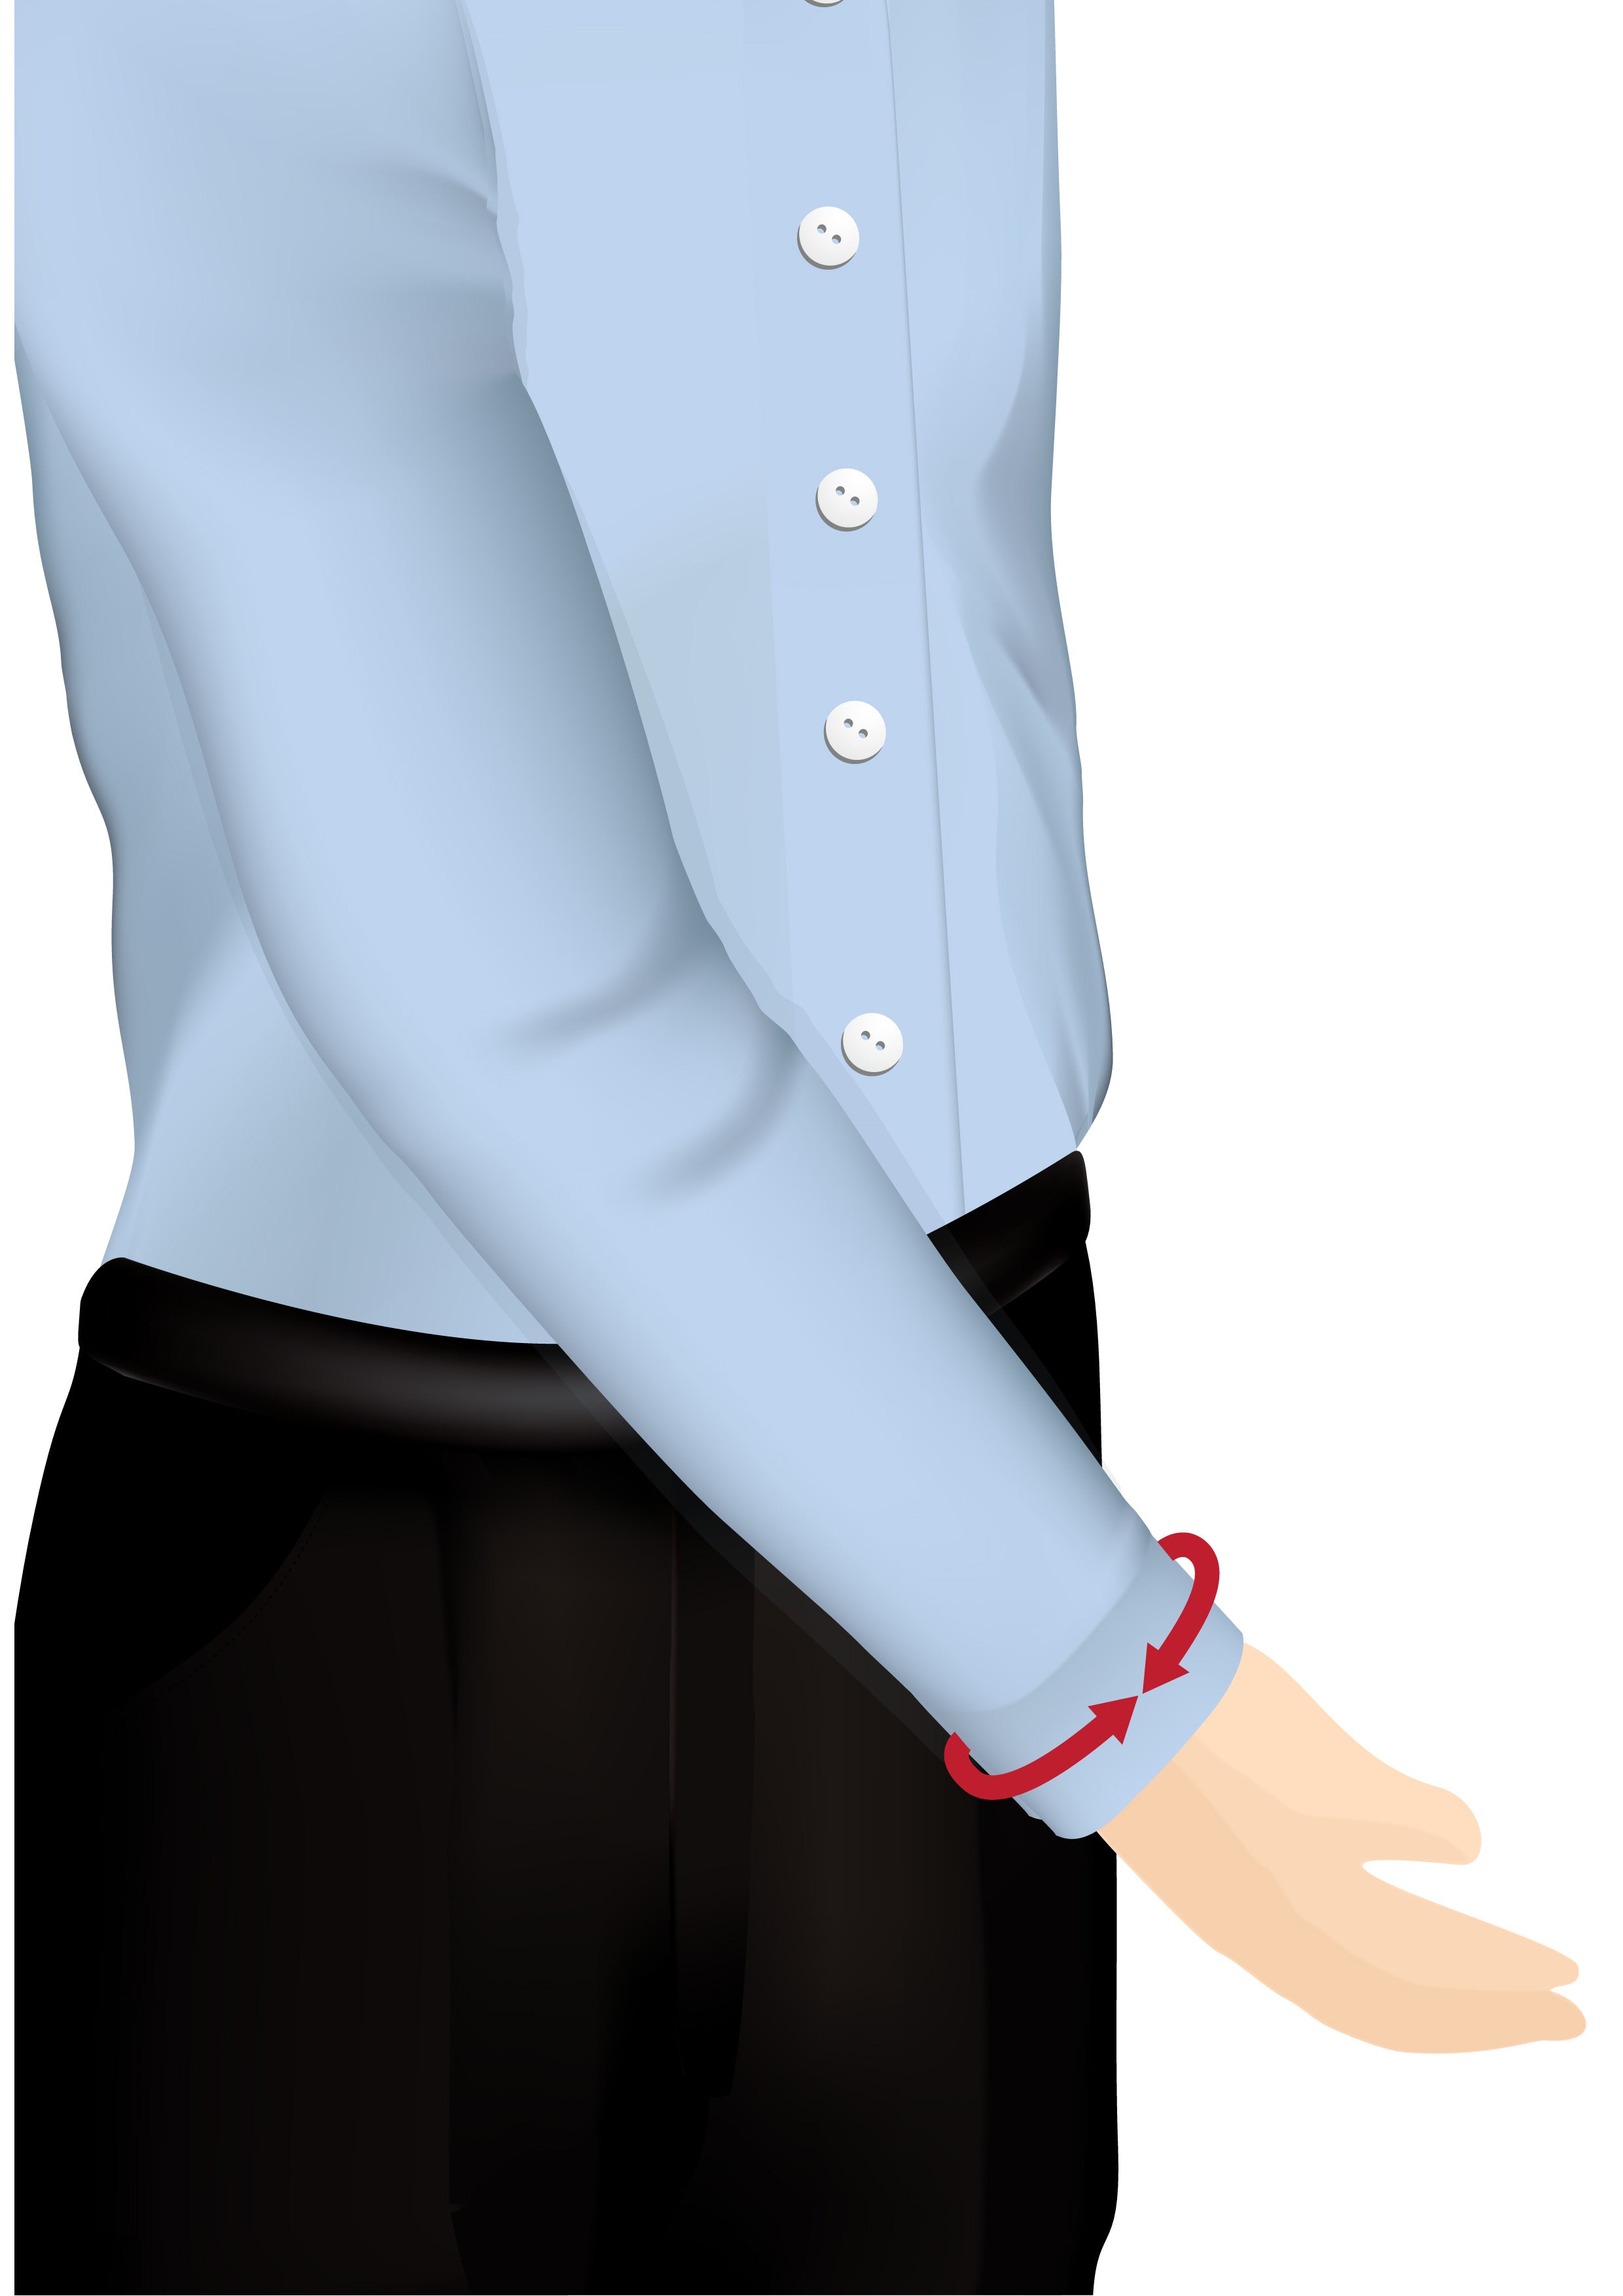
Shirt Cuff (Wrist)
Run the tape around the wrist with a comfortable fit, not loose.
Tailoring Tip - Remember to measure both wrists (left and right), incase you wear a heavier or thicker watch on one wrist.